

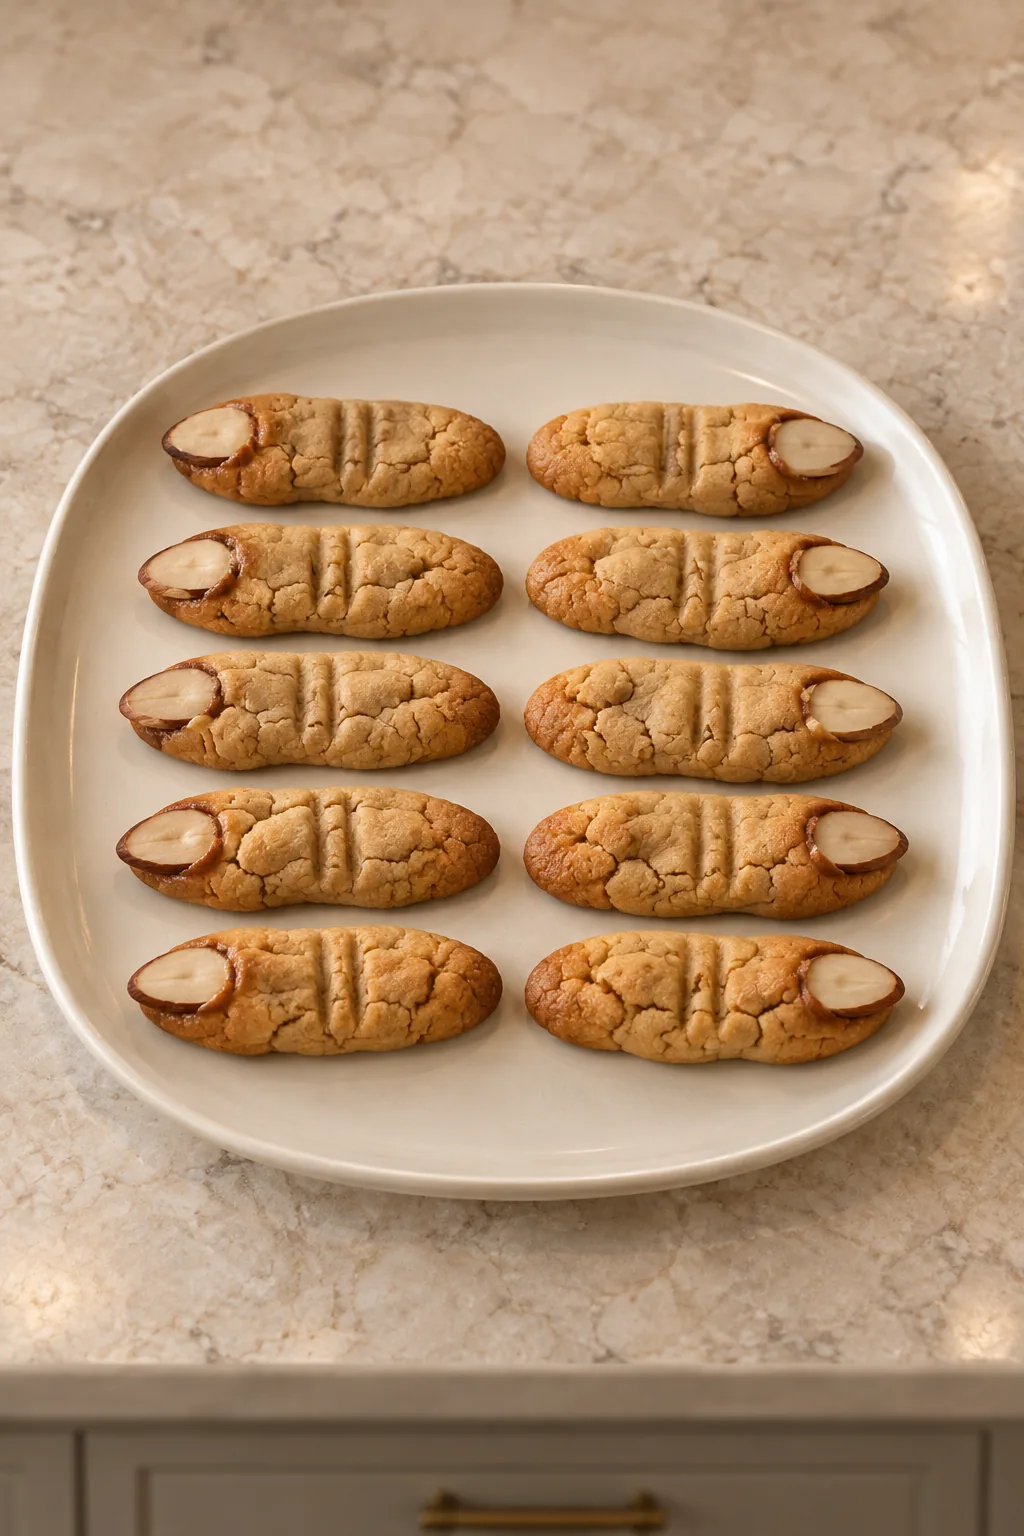
These GAPS Halloween cookies turn a simple peanut-butter dough into little werewolf fingers, complete with sliced-almond nails and spoon-pressed knuckles. The dough contains no grain flour, refined sugar, or leavening. Properly prepared smooth peanut butter, raw honey, and a whole egg make the base.
The useful part is how little equipment you need. Beat the egg, stir in the honey and peanut butter, then shape the fingers right on the greased cookie sheet. The dough thickens as you mix it. Once it is pliable enough to roll, you can make ten fingers, or twelve slightly smaller ones, without cutters or a blender.
As a working, homeschooling mom of six, I appreciate a kitchen project with clear jobs. Our older kids can cook and follow directions. Rolling a short log, setting an almond at the tip, and pressing the knuckles are the kind of separate tasks that make a recipe easy to share. You can keep the shapes simple. A few crooked fingers still do the job.
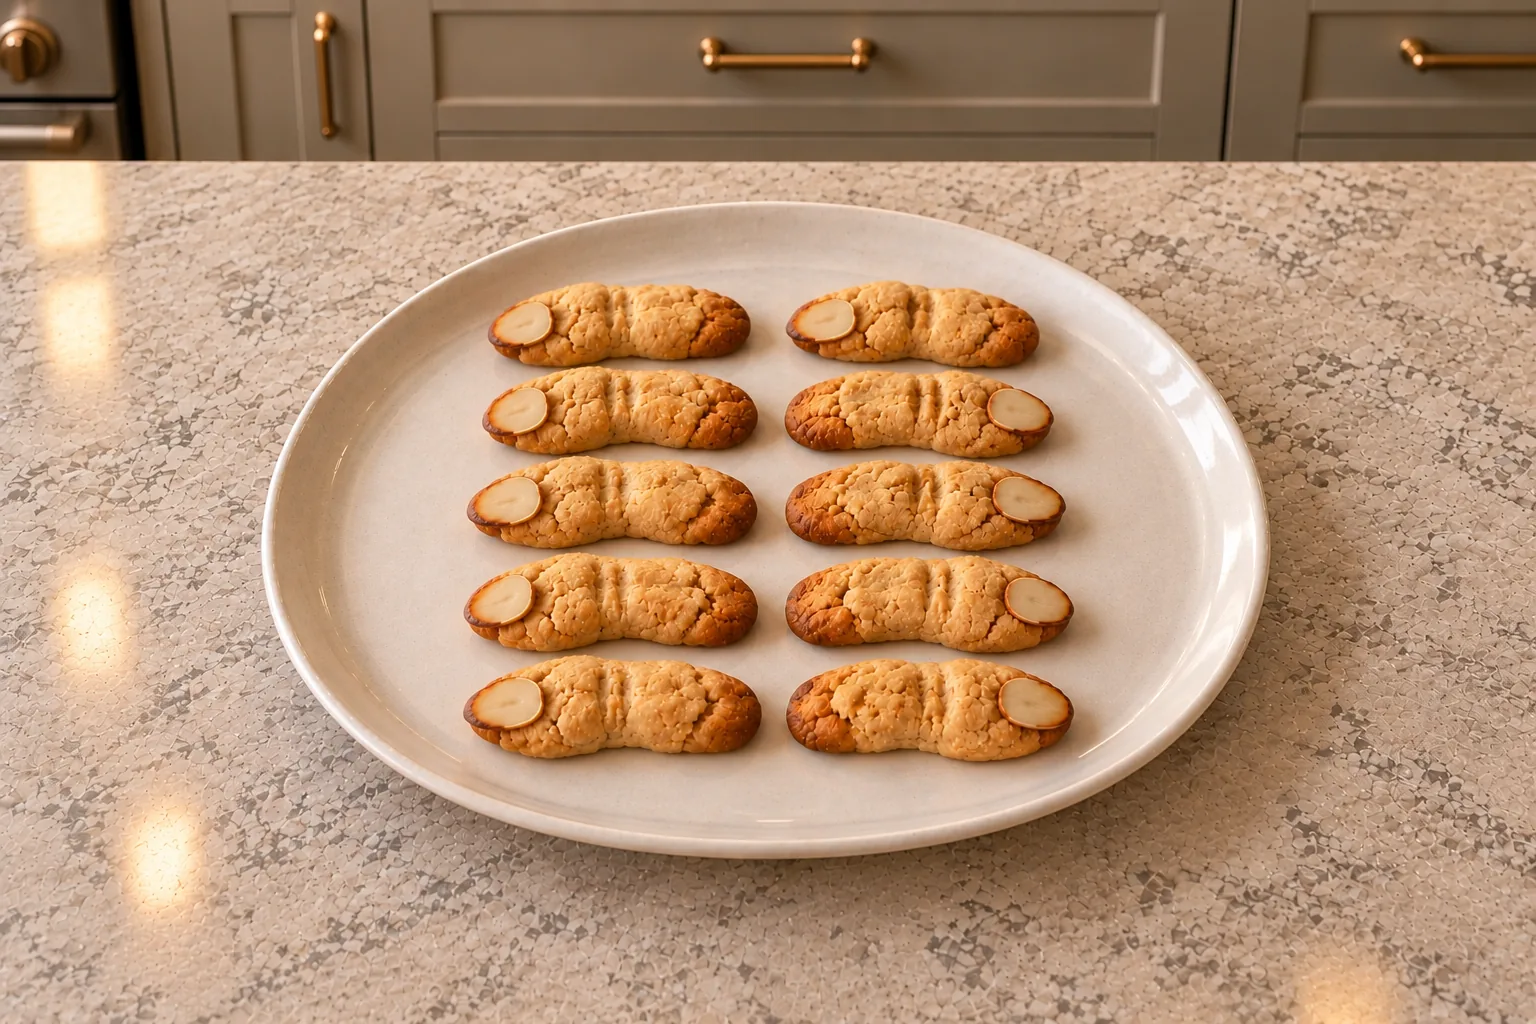
The Peanut Butter Matters
Start with one cup of properly prepared fermented peanut butter. That recipe begins with raw whole peanuts and handles the soaking, fermentation, rinsing, and cooking before they are ground into a spread. It is the preparation behind the butter that makes it useful for this GAPS version.
Peanuts are legumes, even though we use their butter much like almond butter. The GAPS baking guidance allows them when they have been properly prepared. A commercial jar made from unprepared peanuts is not the same starting ingredient. Sugar, hydrogenated oils, or other added ingredients do not belong in this dough either.
Use a smooth butter for these fingers. Large peanut pieces would interrupt the short logs and make the little grooves harder to form. Stir the finished homemade peanut butter so its texture is even before measuring the cup. Do not skim away part of it or add extra oil to make this batch easier to stir.
The remaining dough ingredients are a quarter cup of raw honey and one large whole egg. The honey sweetens the peanut butter. The egg must be beaten first so it mixes evenly through the honey before you add the thick butter. This recipe does not need vanilla, salt, almond flour, coconut flour, baking powder, or baking soda.
For the nails, use thin almond slices from properly prepared almonds. The whole-almond preparation steps explain the soaking, sprouting, and drying. Stop before making the almond butter; this recipe needs slices for the nails, not a second butter in the dough. Have the prepared almonds ready before starting this quick batch. A thin slice sits neatly on a fingertip; a thick chunk is more likely to fall off when the cookie moves.
Where These Cookies Fit On GAPS
This is a Full GAPS baked treat, once the individual ingredients have been introduced and are well tolerated. It is not an Intro Diet recipe. Removing grain flour does not make a sweet peanut-butter cookie suitable for an earlier stage.
Keep the role of the recipe clear too. GAPS places baked goods and other sweet foods as small snacks rather than the main part of meals. These fingers can be a homemade Halloween treat without replacing the meat, eggs, vegetables, stock, and other foods that make up the everyday kitchen.
With the honey amount kept as written, these cookies are not a ketogenic option. Their plant ingredients also keep them outside No-Plant GAPS, and a baked cookie does not fit GAPS Liquid Fasting. Those versions have their own food choices and portions. If you are comparing the wider options, the GAPS food list separates Intro stages from Full GAPS and explains the preparation rules.
The straightforward adaptation here is size. Ten portions make the larger fingers shown in the recipe. Twelve portions make smaller fingers from the same dough. Changing the nut butter, leaving out the egg, or adding a flour would change how the mixture binds and bakes. Those are separate versions to work out, rather than automatic swaps in this batch.
The Tools You Need
A glass mixing bowl, a fork or small whisk, and a spoon handle the dough. For baking, use a flat stainless cookie sheet, a thin spatula, and a wire cooling rack. A measuring cup and quarter-cup measure keep the peanut butter and honey in the right balance.
The thin spatula is especially useful for lifting the full finger without pulling on the almond nail. Have it and the rack beside the oven before baking. You can use the same spoon for mixing and pressing the knuckles, so there is no need for a special shaping tool.
Mix Until The Dough Holds Together
Heat the oven to 350°F and lightly grease a stainless cookie sheet with homemade ghee. You only need a thin coating on the surface. A pool of fat underneath the cookies is unnecessary. Get the cooling rack and a thin spatula ready before the pan goes into the oven.
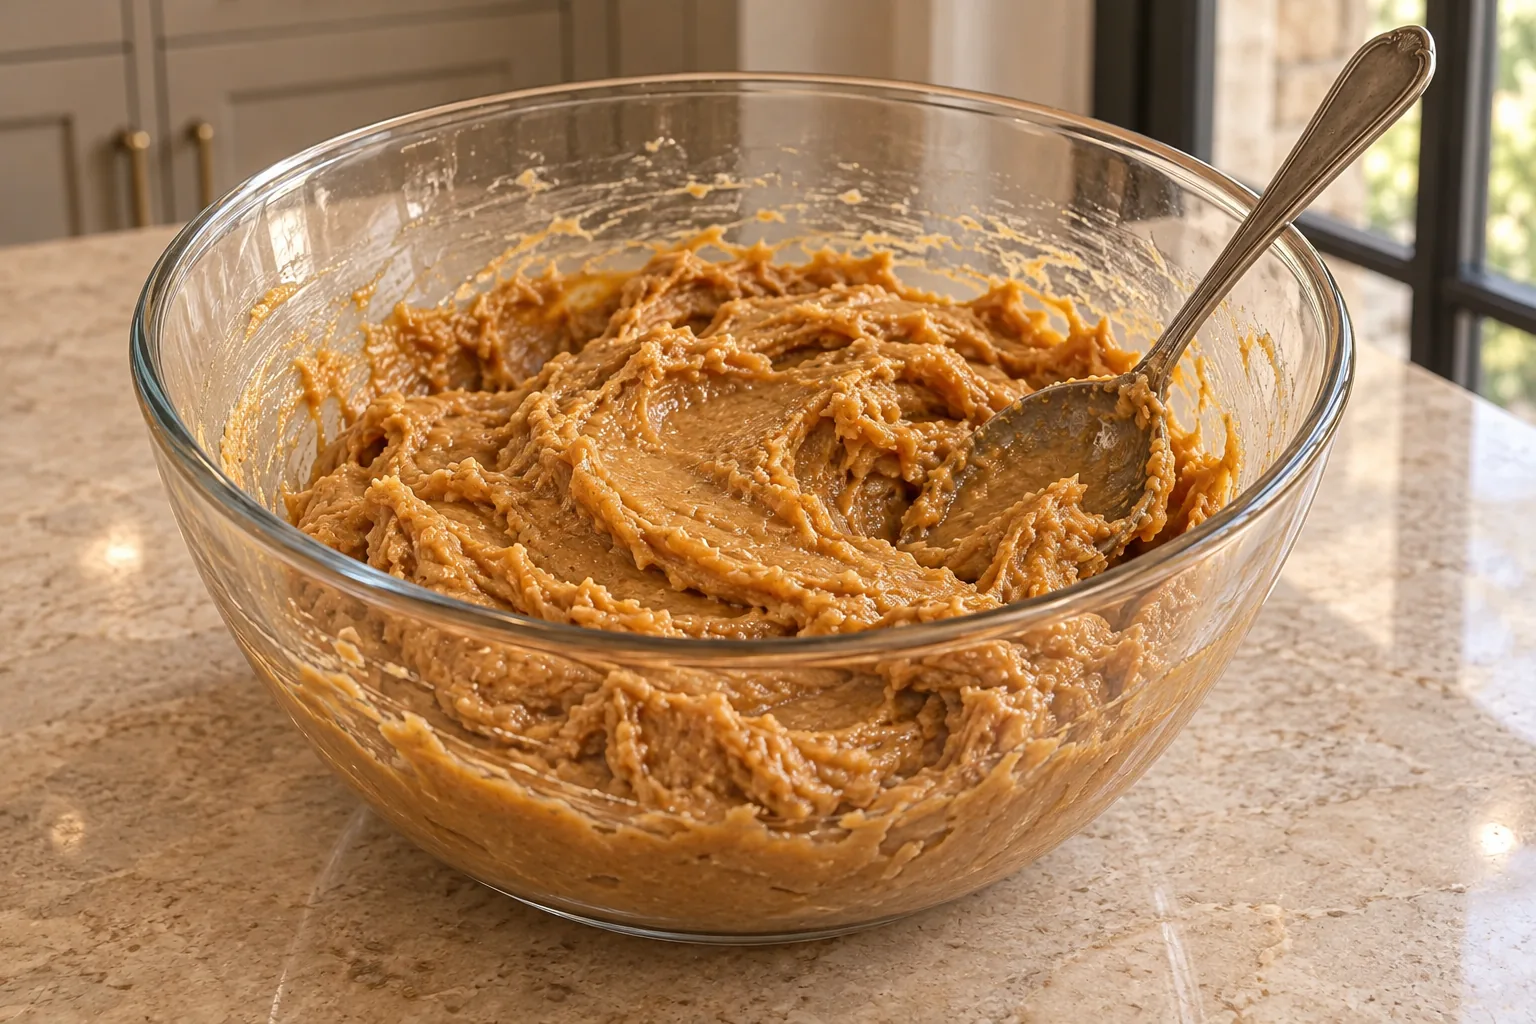
Beat the egg in a bowl with a fork or small whisk until the white and yolk are evenly blended. Here, beating the egg means mixing it while raw; it does not mean cooking scrambled eggs. Stir in the honey, then add the measured peanut butter and mix with a spoon.
Watch the mixture rather than adding another ingredient immediately. As the egg, honey, and peanut butter come together, the dough becomes thicker and more cohesive. A spoonful should hold its shape instead of running back into a puddle. The goal is a pliable mixture you can roll into a short log.
Scrape through the bottom and around the sides of the bowl so there are no separate streaks of egg or honey left. Adding flour to a dough that has not finished mixing would make a different cookie, and adding water would loosen the mixture you are trying to shape.
Shape The Fingers On The Pan
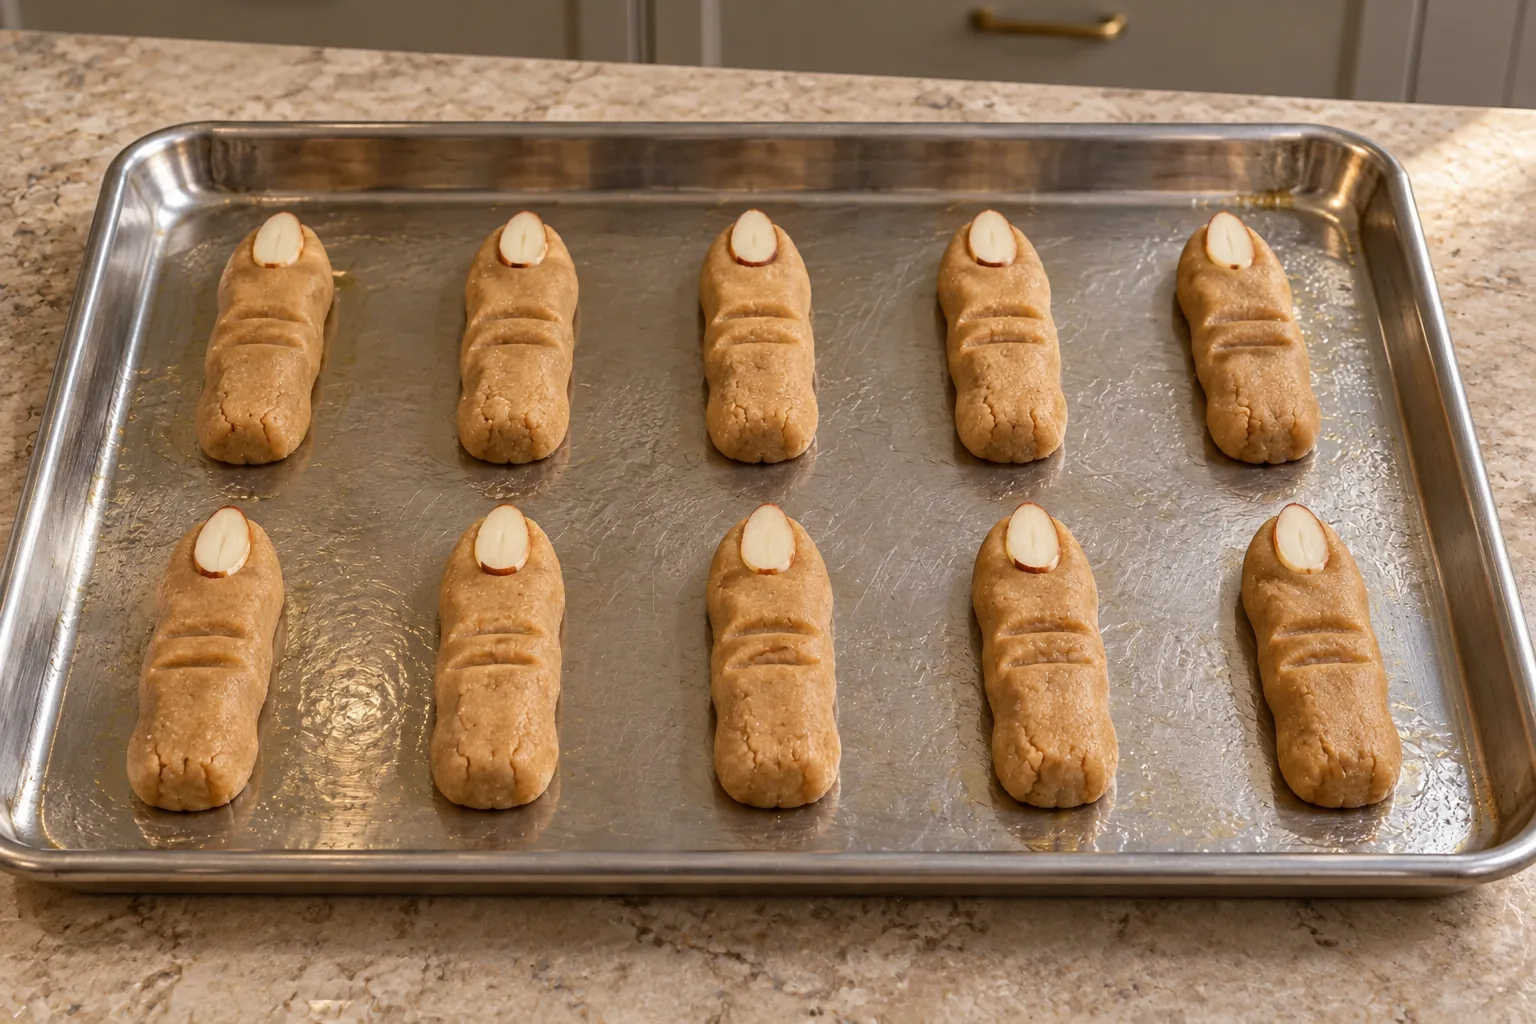
Divide the dough into ten equal portions, or twelve for smaller cookies. Roll each portion into a log about three inches long. Place it on the greased cookie sheet before finishing the details. That saves you from moving a fully decorated finger and losing the almond nail on the way.
Round and slightly flatten the ends. Press one thin almond slice into one tip for the nail. It needs contact with the dough, not just a loose position on top. Use a spoon to make shallow knuckle indentations along the log. Press firmly enough to leave a visible line, but do not cut through the finger.
Try to keep the fingers close in thickness even when their shapes vary. A very thin tip can brown before a much thicker middle is ready. The batch can look handmade while still baking evenly. Leave space between the fingers so you can get the spatula underneath each one later.
Use Firmness And The Underside As Your Cues
Bake for 12 to 15 minutes. Start checking at the early end of that range. The fingers should be firm to a light touch and browned underneath. Do not wait for every part of the top to become dark. The underside is the part in direct contact with the sheet, so it gives you a useful view of how far the bake has gone.
The peanut aroma should become noticeable as the cookies bake. That smell is helpful context, but it does not replace the firmness and underside checks. If the dough still feels loose and the bottom has not browned, it needs more time within the recipe’s baking range.
Lift each finished cookie carefully with a thin spatula and move it to the cooling rack. Support the full length instead of grabbing the almond end. These are flourless fingers, and the long shape is easier to break than a small round cookie while it is warm.
Let the cookies cool before stacking them or closing a storage container. Move them as little as possible while they are warm. You can put them on a serving plate once they are firm enough to handle without bending or losing a nail.
Serving And Storage
Serve these as a small Full GAPS treat. The finger shape is the decoration, so you do not need a second icing recipe or a commercial candy finish. Keeping the almond nail and spoon marks visible is enough to make the theme clear.
For leftovers, cool the cookies and place them in a sealed container. Keep them refrigerated and use within three to four days. Lay them flat rather than filling a jar where the fingers can knock against one another. If you freeze them for longer storage, separate the layers and thaw in the refrigerator before handling.
The full baking window is 12 to 15 minutes, so the five-minute dough preparation gives a total of roughly 17 to 20 minutes before cooling. The card uses the upper end, 20 minutes. Preparing the peanut butter and almonds is a separate advance job and is not included in that quick cookie time.
Questions Before You Bake
Can I Use A Blender?
You do not need one for a single egg and a small dough batch. A fork blends the egg, and a spoon mixes in the peanut butter. Using those tools also lets you see the moment the mixture thickens.
Can I Use Crunchy Peanut Butter?
Use smooth peanut butter here. Crunchy pieces change the shaping texture and can sit across the lines you press into the finger. Prepare the smooth version first rather than trying to crush the pieces after the egg and honey are already in the bowl.
Can I Make A Smaller Cookie?
Yes. The same batch can be divided into twelve sections instead of ten. Keep the logs about three inches long and check them at 12 minutes. A smaller cookie still needs to be firm to a light touch and browned underneath.
Do I Need To Add Flour?
No. There is no flour in this formula. The peanut butter, honey, and egg thicken together as you stir. Adding flour would change the balance and the shaping result. Make sure the egg is evenly beaten and the ingredients are completely mixed before deciding the dough is too loose.
Are These The Same As The Chocolate Heart Cookies?
No. Chocolate Heart Cookies With Peanut Butter Frosting use a different almond-flour dough and a separate filling. They are an occasional Later Full GAPS option with cocoa. Choose that post when you want the chocolate sandwich cookie, and keep this one for the short peanut-butter finger formula.
Werewolf Finger Cookies Recipe
Werewolf Finger Cookies for Full GAPS
Ingredients
Equipment
Method
- Preheat the oven to 350 degrees F. Lightly grease a flat stainless cookie sheet with homemade ghee. Set out a cooling rack and thin spatula.
- Beat the whole egg until the white and yolk are evenly blended. Mix with the raw honey, then stir in the smooth peanut butter with a spoon. Continue mixing until the dough thickens, holds its shape, and is pliable.
- This recipe makes ten cookies, or twelve smaller ones. Divide the dough into equal portions. Roll each portion into a log about three inches long.
- Place the logs on the greased sheet and finish them there. Slightly flatten and round both ends. Press one thin almond slice into one tip for the nail. Use a spoon to indent the knuckles without cutting through the dough. Leave space between fingers.
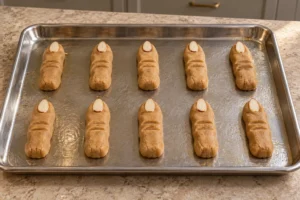
- Bake for 12 to 15 minutes, checking from 12 minutes, until the fingers are firm to a light touch and browned underneath.
- Carefully lift each finger with a spatula, supporting its full length, and transfer to a cooling rack. Cool before serving or stacking.
Notes
Tried this recipe?
Let us know how it was!More Homemade GAPS Treats
If you have more prepared peanut butter to use, Coconut Peanut Butter Balls give you a coconut-based treat without the finger-shaping step. For a seasonal baked choice with pumpkin and warm spices, try Pumpkin Cookie Kisses.
You can also find Sweet Snacks, GAPS Style among the current and upcoming family resources in the WFLI shop. It is the snack-focused course to look for when you want to build a wider set of GAPS-friendly treats instead of searching for each one separately.

Leave a comment