

Dehydrated fermented nut cheese begins with the same clear fermentation endpoint as a soft cultured spread, then continues into a firm wheel that can be sliced. Coconut oil gives this formula structure, while a cheesecloth-lined mold and gentle dehydration remove enough moisture for the cheese to hold its shape.
I am much more comfortable fermenting a batch when the recipe gives me visible checkpoints instead of asking me to trust the clock. Here, the puree first rises and fills with tiny sponge-like bubbles. Only after that change is complete does it go into the mold and dehydrator. That order keeps the process understandable when the kitchen is busy and the room temperature changes from one batch to the next.
This post contains one complete formula: the coconut-oil cheese finished in a dehydrator. The soft olive-oil fermented nut cheese has its own measurements, photographs, texture, and recipe card. The strained and chilled coconut-oil version is also a separate method.
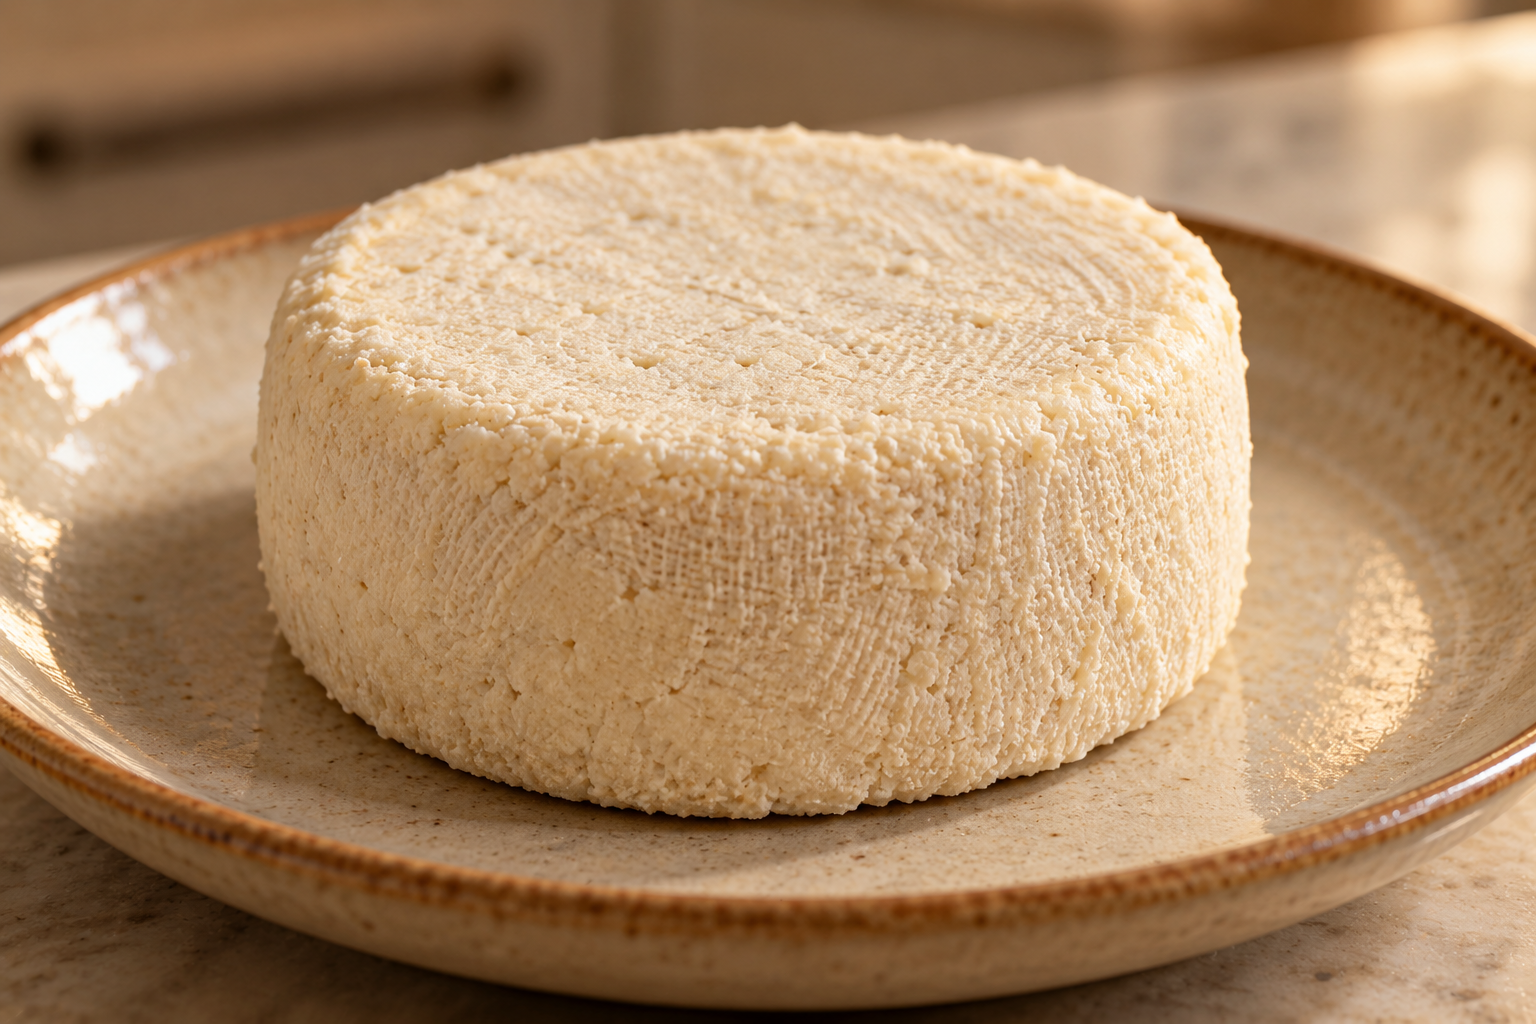
Why Coconut Oil and Dehydration Matter
This formula uses one-quarter cup coconut oil instead of olive oil. Coconut oil firms as it cools, so it supports a sliceable texture after the cultured puree has spent time in a mold and dehydrator. The finished cheese should hold together when cut, with a dense pale center and a dry, clean outer surface.
Dehydration is the finishing step, not the fermentation method. The nut mixture must first reach the same risen, aerated endpoint in its glass vessel. Putting an unchanged puree into the dehydrator early would skip the cue that tells us the culture has moved through the entire batch.
Choose Macadamias or Walnuts
Use two cups raw macadamia nuts or raw walnuts and choose one for the whole batch. The photographed cheese uses macadamias, which produce a mild, pale wheel. Walnuts make a darker cheese with a more pronounced nut flavor.
The source allows other raw nuts or seeds, but this accepted Full GAPS formula keeps the macadamia-or-walnut routes. Different nuts absorb water and blend differently. They should not be quietly substituted into a recipe whose texture cues and photographs were built around macadamias.
Soak the Nuts Overnight
Place the nuts in a clean glass or ceramic bowl. Add one teaspoon mineral salt and enough filtered water to cover them by two inches. Stir so the salt dissolves, then soak overnight.
The source note uses two teaspoons salt for four cups nuts, making one teaspoon the exact half-scale for this two-cup formula. After the soak, drain and rinse the nuts thoroughly in a stainless-steel colander. They should feel wet and slightly plumper, with no stale odor.
Use a Finished Vegetable Ferment
Measure one-half cup completed homemade additive-free fermented vegetables, such as sauerkraut, including their natural liquid. This must be a ferment that has already reached its correct endpoint. Fresh salted cabbage or a newly packed jar is not an equivalent culture.
The fermented vegetables carry both flavor and an established living culture into the nut puree. Measure them as part of the formula rather than adding an unrecorded splash of brine later.
Blend the Coconut-Oil Base
Add the soaked nuts, fermented vegetables, one-quarter cup coconut oil, two tablespoons hulled tahini made from properly prepared sesame, one tablespoon fresh lemon juice, one garlic clove, and one-half teaspoon mineral salt to a high-power blender with approved glass or stainless-steel food-contact surfaces.
Blend for about 50 seconds. The mixture should become smooth, pale, and thick, without pieces of nut or strands of cabbage. It should move around the blade as one creamy mass. Stop and scrape only when necessary.
If the blender cannot turn the mixture, the source permits a small amount of filtered water, fermented vegetables, or oil. Add only enough to restore movement. A large unmeasured pour creates a loose mixture that will not match the mold, dehydration time, or finished texture in this recipe.
Leave Room for the Ferment to Rise
Transfer the smooth puree to a clean wide-mouth glass vessel with close to twice the capacity of the fresh mixture. Use a suitable spatula to settle it below the rim and keep the upper glass as clean as practical.
Set a clean metal lid on loosely or screw it on only loosely. The cover protects the surface while allowing fermentation gas to escape. Do not seal pressure into the vessel.
Ferment Until the Whole Puree Looks Spongy
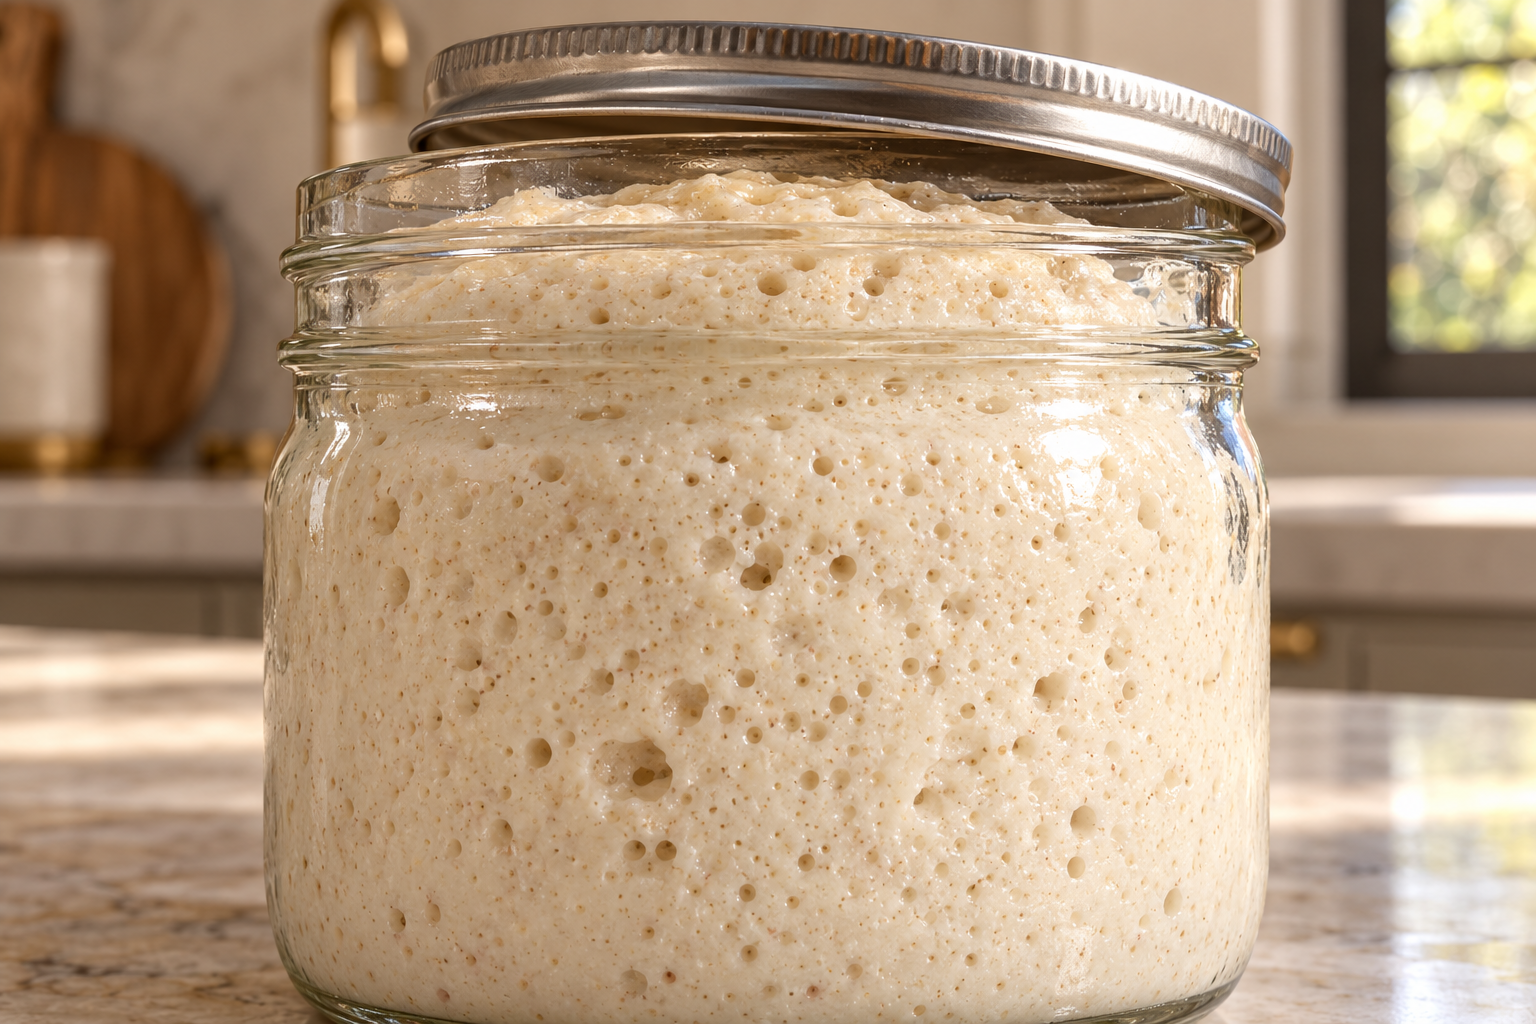
Keep the vessel at warm room temperature away from direct sunlight. Begin checking at about one and one-half days. A cooler room may require longer, so the first check is a time to observe rather than an automatic stopping point.
The puree is ready for molding when the whole mass has risen and many small air pockets appear throughout it. Through the glass it should look aerated and sponge-like, not dense and flat. A few isolated bubbles do not show that the entire mixture has reached the endpoint.
Prepare the Cheesecloth-Lined Mold
Choose a clean ceramic mold that will give the cheese a simple wheel shape. Line it with clean cheesecloth and lightly rub the cloth with coconut oil or olive oil. The light coating helps the finished wheel release without adding a new ingredient to the cheese itself.
Spoon the fully fermented puree into the lined mold. Press it gently into the corners and level the top so there are no large empty pockets. Fold the cheesecloth neatly over the surface rather than twisting it into a hard knot.
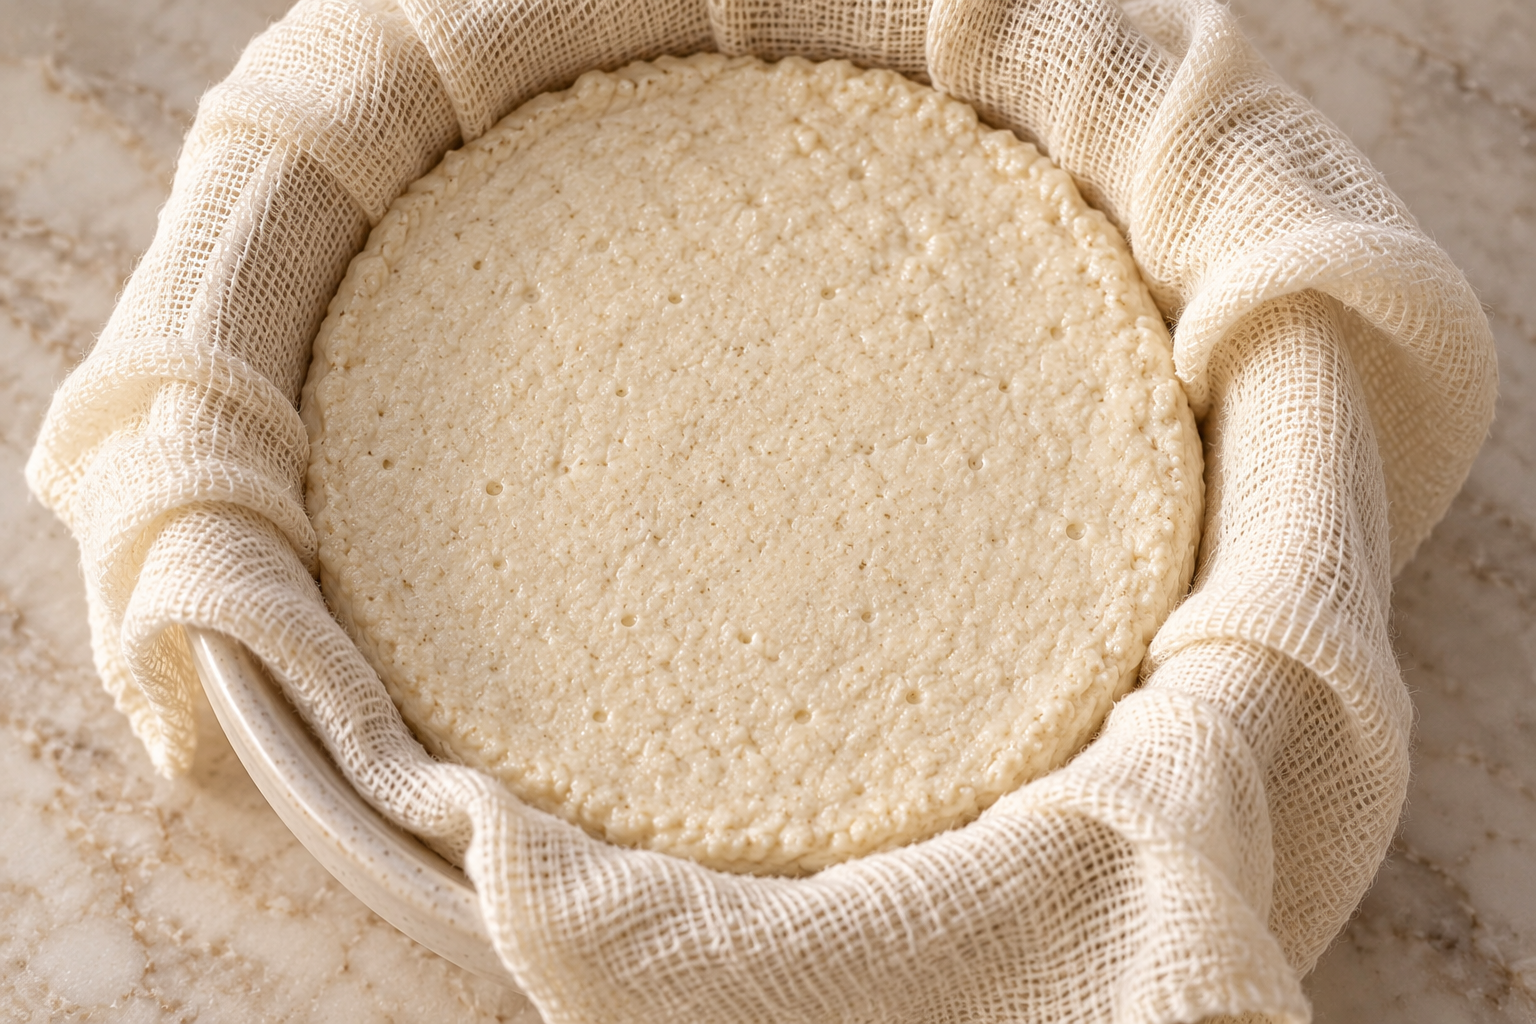
Dehydrate Until the Wheel Holds Its Shape
Place the filled mold in the dehydrator for 12 to 24 hours. Check the cheese rather than choosing a duration only because it is convenient. It is ready to unmold when the outside has set and the wheel can hold its shape without slumping.
Lift the cheese from the mold with the cloth and remove the cheesecloth carefully. If you want a firmer center, return the unmolded, unwrapped wheel to the dehydrator for another 12 to 24 hours. This second period exposes more surface and continues removing moisture.
The goal is a cohesive cheese that cuts cleanly, not a brittle or cracked puck. The outside should feel dry and firm, while the center remains dense and creamy enough to slice without crumbling.
Chill Before Slicing
Refrigerate the finished wheel after dehydration. Chilling firms the coconut oil and makes the texture easier to judge. A clean knife should pass through with light resistance and leave a defined face on the slice.
The aroma should be pleasantly tangy, nutty, and savory, with lemon and garlic underneath. Macadamia cheese will be pale cream; walnut cheese will be darker. Unexpected colored or fuzzy growth and a foul odor are not part of the intended result.
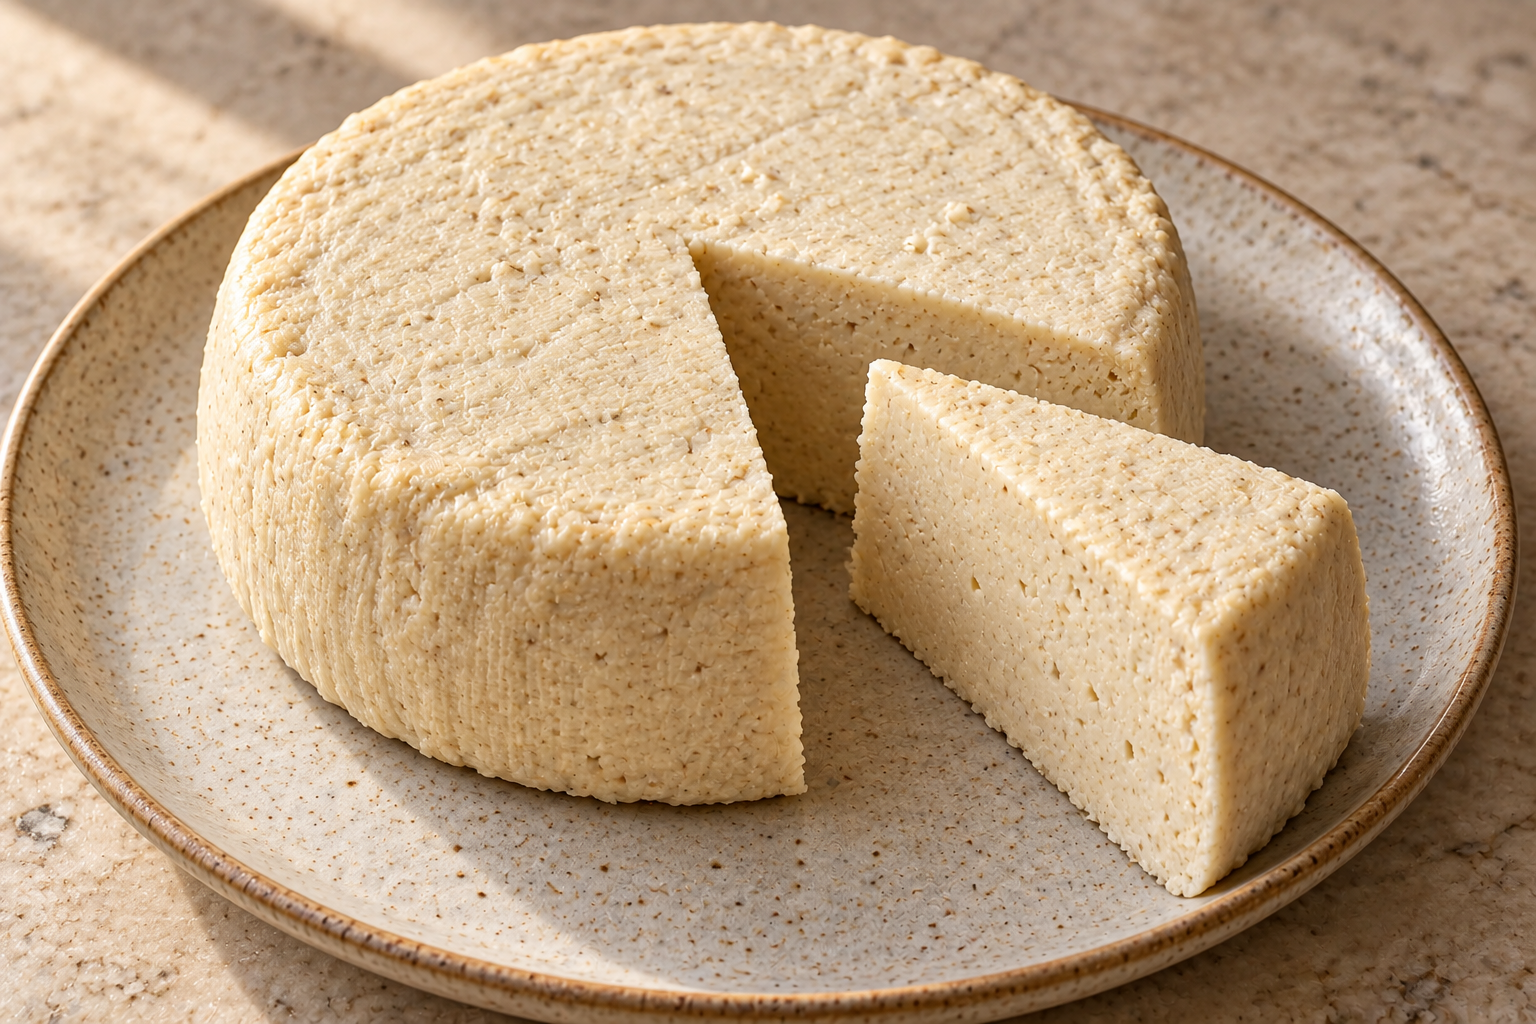
Dehydrated Fermented Nut Cheese for Full GAPS
Ingredients
Equipment
Method
- Combine the nuts, 1 teaspoon mineral salt, and enough filtered water to cover by 2 inches in a clean glass or ceramic bowl. Stir to dissolve and soak overnight.
- Drain and rinse thoroughly in a stainless-steel colander. Measure the full 2 cups soaked, wet nuts into the formula.
- Blend the soaked nuts, fermented vegetables, coconut oil, prepared tahini, lemon juice, garlic, and remaining 1/2 teaspoon salt for about 50 seconds, until smooth and thick. If the blender cannot turn, add only a small source-permitted amount of filtered water, fermented vegetables, or oil.
- Transfer the puree to a clean wide-mouth glass vessel that holds close to twice its fresh volume. Keep the upper walls clean and settle the puree below the rim.
- Cover loosely with a clean metal lid without sealing pressure. Hold at warm room temperature away from direct sunlight.
- Begin checking at about 1 1/2 days and allow longer in a cooler room. Continue until the whole puree has risen and is filled throughout with many sponge-like air bubbles.
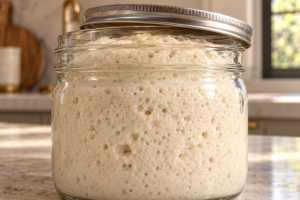
- Line a clean ceramic mold with cheesecloth lightly rubbed with coconut oil or olive oil. Spoon in the fully fermented puree, press gently to remove large empty pockets, level the top, and fold the cloth over it.
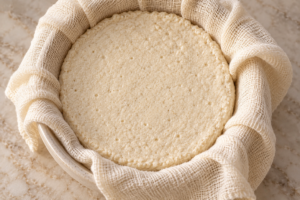
- Dehydrate in the mold for 12 to 24 hours, until the outside is set and the wheel holds its shape without slumping.
- Lift the wheel from the mold and remove the cheesecloth. For a firmer center, return the unmolded, unwrapped wheel to the dehydrator for another 12 to 24 hours.
- Refrigerate the finished wheel until cold and firm, then slice with a clean knife.
Notes
Tried this recipe?
Let us know how it was!Full GAPS Placement
This recipe belongs in Full GAPS after the chosen nut, properly prepared hulled sesame tahini, completed fermented vegetables, coconut oil, lemon, garlic, and mineral salt are appropriate and tolerated. Fermentation does not move nuts or sesame into an earlier stage.
The cheese is dairy-free and egg-free. It still contains nuts and sesame. Soaking, fermenting, and dehydrating do not erase an individual sensitivity.
Serving Ideas
Cut the chilled wheel into thin wedges or small slices and serve it with cooked vegetables, cultured vegetables, or a compatible Full GAPS meal. Because the flavor is concentrated and tangy, a modest slice can carry a plate without extra garnish.
For a softer spread that can be spooned straight from a jar, use the separate soft fermented nut cheese. That recipe uses olive oil and stops after chilling rather than borrowing the mold and dehydrator steps from this wheel.
Storage
Keep the finished cheese covered in the refrigerator and use a clean knife for every serving. Return the wheel to the refrigerator promptly so the entire batch does not repeatedly warm on the table.
The source supplies the fermentation and dehydration method but does not give an exact refrigerated storage duration for this formula. Continue using the same sensory attention after chilling and discard the cheese if its odor, color, or surface changes in a way that does not match the clean cultured wheel you made.
Recommended Equipment
- Glass or ceramic soaking bowl
- Stainless-steel colander
- High-power blender with glass or stainless food-contact surfaces
- Suitable flexible spatula
- Wide-mouth glass fermentation vessel with close to twice the puree capacity
- Loose-fitting clean metal lid
- Clean cheesecloth
- Ceramic mold
- Food dehydrator
- Measuring cups and spoons
Frequently Asked Questions
How Do I Know When Fermentation Is Complete?
Look for the entire puree to rise and fill with many sponge-like bubbles. Start checking at about one and one-half days and allow more time in a cooler room.
Can I Dehydrate the Cheese Before It Rises?
No. The rise and distributed bubbles are the fermentation endpoint for this formula. Mold and dehydrate only after that cue is present through the whole puree.
Why Does This Recipe Use Coconut Oil?
Coconut oil firms when chilled and supports the wheel’s sliceable texture. Olive oil belongs to the separate soft-cheese formula.
How Long Should the Wheel Stay in the Dehydrator?
Keep it in the lined mold for 12 to 24 hours, until it holds its shape. For a firmer center, remove both mold and cloth and dehydrate for another 12 to 24 hours.
Should the Finished Cheese Be Hard?
It should be firm enough to slice and hold a clean edge, with a dense center. It should not be brittle, cracked, or dried through like a hard cracker.
Can I Use a Plastic Mold?
Use the supported ceramic mold and clean cheesecloth for this recipe. That keeps the fermented food against the intended nonreactive surfaces throughout the finishing step.
More Ferments for the Family Kitchen
For more practical fermentation projects with visible endpoints and measured instructions, visit the Well Fed & Lived In shop for the upcoming Ferments Cookbook and GAPS kitchen resources.

Leave a comment