

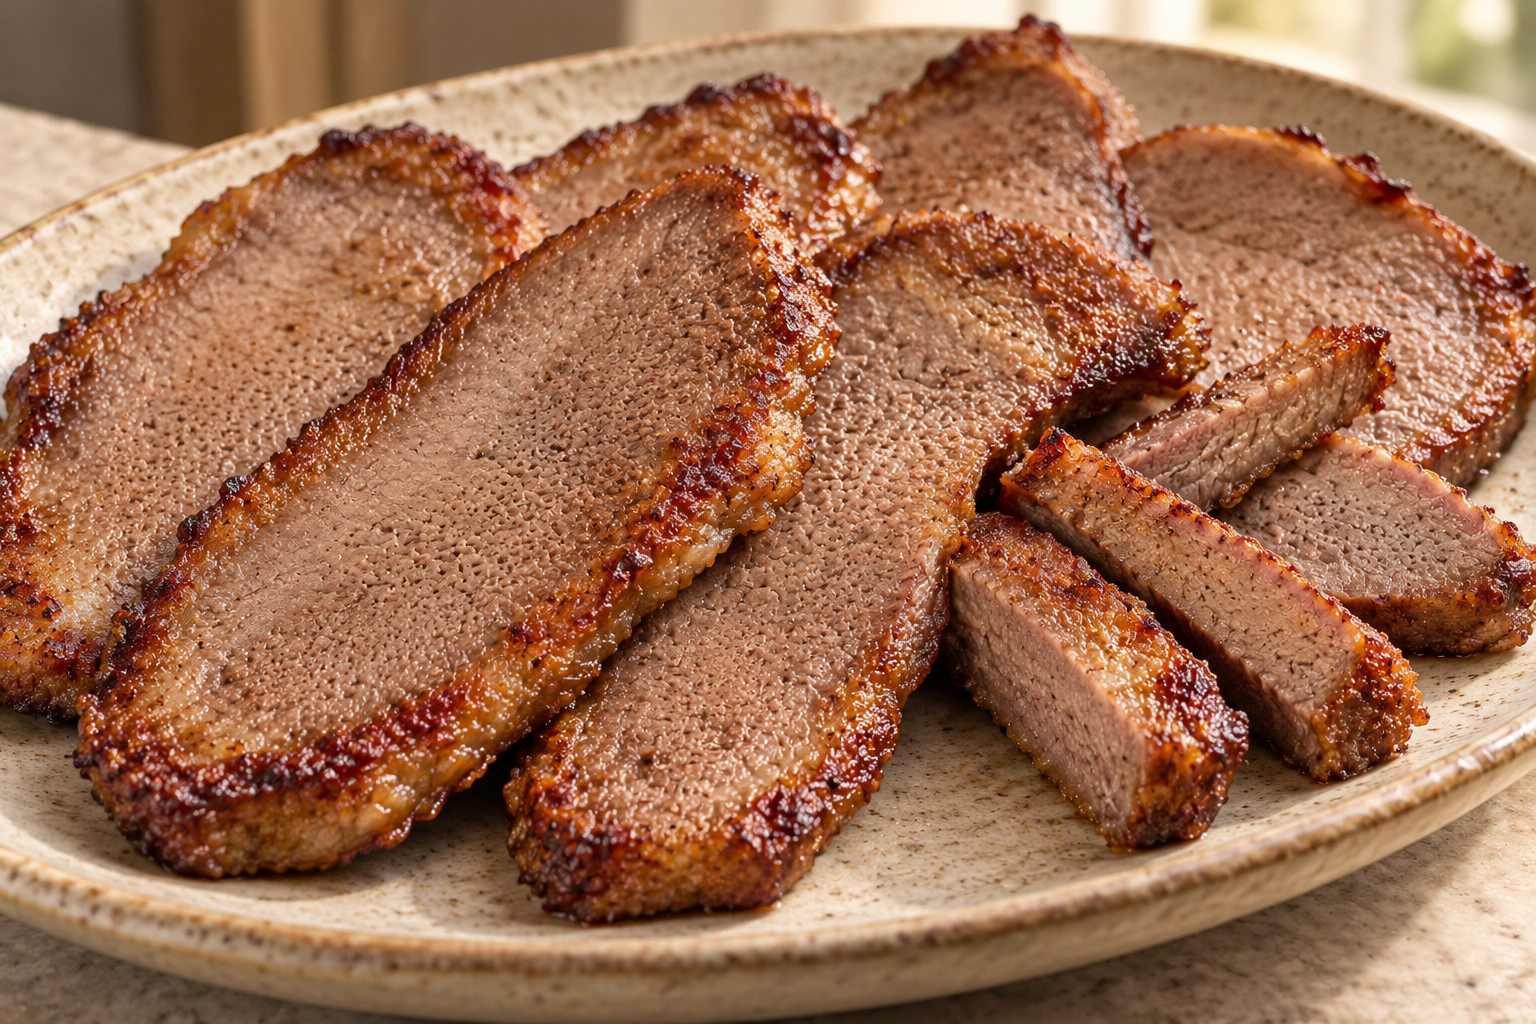
Crispy beef tongue is much easier to make when the work is divided into two clear jobs. First, cook the whole tongue until it is tender enough to peel. Then slice it and pan-crisp the pieces in tallow. The finished slices have deeply browned edges and a tender center, with a clean beef flavor rather than the mineral taste some people expect from organ meat.
The pressure-cooker route keeps the first stage mostly hands-off. The stovetop route takes longer but uses the same ingredient list and ends at the same physical cue: a knife should slide easily into the center. Both routes lead into one shared peeling, slicing, and frying method, so this remains one recipe rather than two nested formulas.
In our house, weekdays already hold breakfast, homeschool, work on three side businesses, lunch, dinner, and then my second-shift job. A recipe that can pause after the first cooking stage is useful. The whole cooked tongue can be chilled, then sliced and crisped when the next meal window opens. That is far more workable than needing one uninterrupted afternoon.
GAPS Placement: Full GAPS; not the Introduction Diet
Prep Time: 15 minutes
Pressure-Cook Time: 35 minutes, plus full natural release
Crisping Time: About 30 to 40 minutes for 2 to 3 batches
Yield: 5 servings
Why Crispy Beef Tongue Works
Tongue is naturally fine-grained and contains small seams of fat throughout the meat. Tenderizing it first softens the connective tissue. The second skillet step dries and browns the outside of each slice while the center stays moist. Trying to fry raw tongue would not produce the same texture; the long first cook is what makes the short crisping stage possible.
The half-inch slices matter. Very thin pieces can dry out before the surface browns. Much thicker pieces take longer to heat through and keep more of the soft cooked texture in every bite. Cut from the tip at a slight angle so the first pieces have enough surface area to lie flat in the skillet.
Work in batches. The slices can sit close together, but they should touch the pan rather than overlap. A crowded pile traps steam. Two or three batches give the moisture somewhere to escape and allow a browned crust to form.
Full GAPS Placement And Ingredient Notes
The 2020 Gut and Physiology Syndrome includes fresh and frozen organ meats among the recommended Full GAPS foods and specifically names tongue among organ meats. This recipe belongs on Full GAPS rather than the Introduction Diet because it is a pan-crisped organ-meat dish with optional dry spices.
Use fresh or properly thawed beef tongue. Rinse it under cold water and pat away excess surface water before it goes into the cooker or pot.
Beef tallow is the primary frying fat here. Use two to three tablespoons across the batches. The pan should have a thin glossy film, not a deep pool. If the first batch absorbs most of the fat, add enough for the next batch before the meat goes in.
Use natural sea salt and keep the total within the measured two-to-three-teaspoon range. The stovetop route puts two teaspoons into the cooking water, leaving up to one teaspoon for the skillet. The pressure-cooker route does not need salt in its three cups of water, so divide the salt across both sides of the frying batches.
Black pepper, pure garlic powder, and pure ground cumin are optional Full GAPS seasonings. Check that each is a single spice without starch, sugar, anti-caking blends, flavoring, or another added ingredient. The tongue, tallow, and salt are enough when you want the simplest version.
The liquid left after cooking one tongue in plain water is tongue-cooking liquid. It is not GAPS meat stock because this pot does not contain raw meaty bones or joints. Label it accurately if you save it.
Pressure-Cooker Route
Put the whole tongue and three cups of filtered water into the pressure cooker. Check that the sealing ring, lid, and valve are seated correctly. Close the lid, seal the valve, and use the Stew setting for 35 minutes.
When the cycle ends, leave the valve sealed and allow the pressure to release fully and naturally. Do not drape a towel over the valve or force a quick release. The pin must fall on its own before the lid opens.
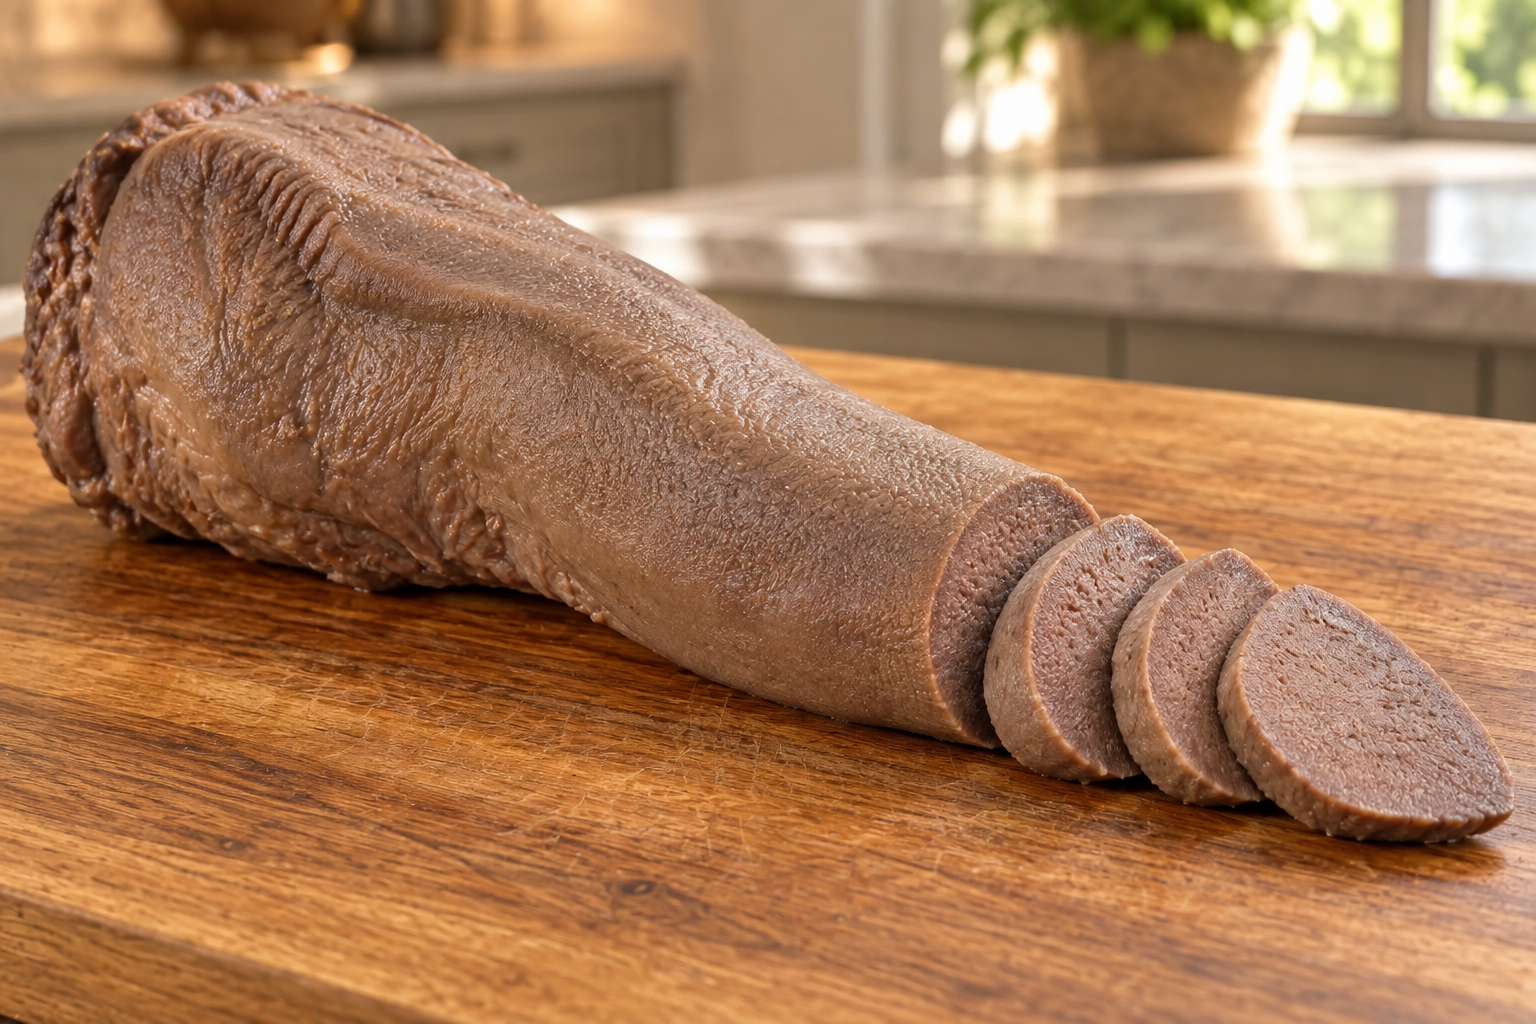
Lift the tongue out with stainless-steel tongs and place it on a wood cutting board or rimmed stainless tray. It will look pale gray-brown and feel heavy and supple. Let it cool only until you can handle it safely. Peeling is easiest while the outer skin is still warm.
Stovetop Route
Put the tongue into a large stainless-steel pot and add enough filtered water to cover it. Add two teaspoons of the measured sea salt. Bring the water to a boil, then lower the heat until the surface holds a quiet simmer rather than a hard rolling boil.
Cook for about one hour per pound, usually at least three hours. Check the thick center with a knife. The blade should slide inward easily without meeting a rubbery core. If it stops or the center still feels firm, simmer another hour and check again.
Lift the tongue out with tongs and let it cool until it is comfortable to handle. The same peeling and frying directions follow either tenderizing route.
Peel, Slice, And Crisp
Make a shallow cut through the thick outer skin near the base or along one side. Catch the edge with your fingers and peel it away from the cooked meat. Properly tender tongue releases its skin in broad, thick pieces. If the skin clings tightly and pulls chunks of meat with it, the tongue needed more time in the first cooking stage.
Trim away any rough tissue at the base. Starting at the tip, cut the tongue on a slight angle into slices about one-half inch thick. The meat should hold its shape while yielding easily to the knife. If you prefer strips for bowls or salads, keep the slices whole for frying and cut them after they are crisp.
Heat the exact Le Creuset Signature 9-inch skillet in Artichaut over medium-high heat. Add about one tablespoon tallow and turn the pan so the fat forms a thin film. Arrange a single layer of tongue slices in the skillet without overlapping them.
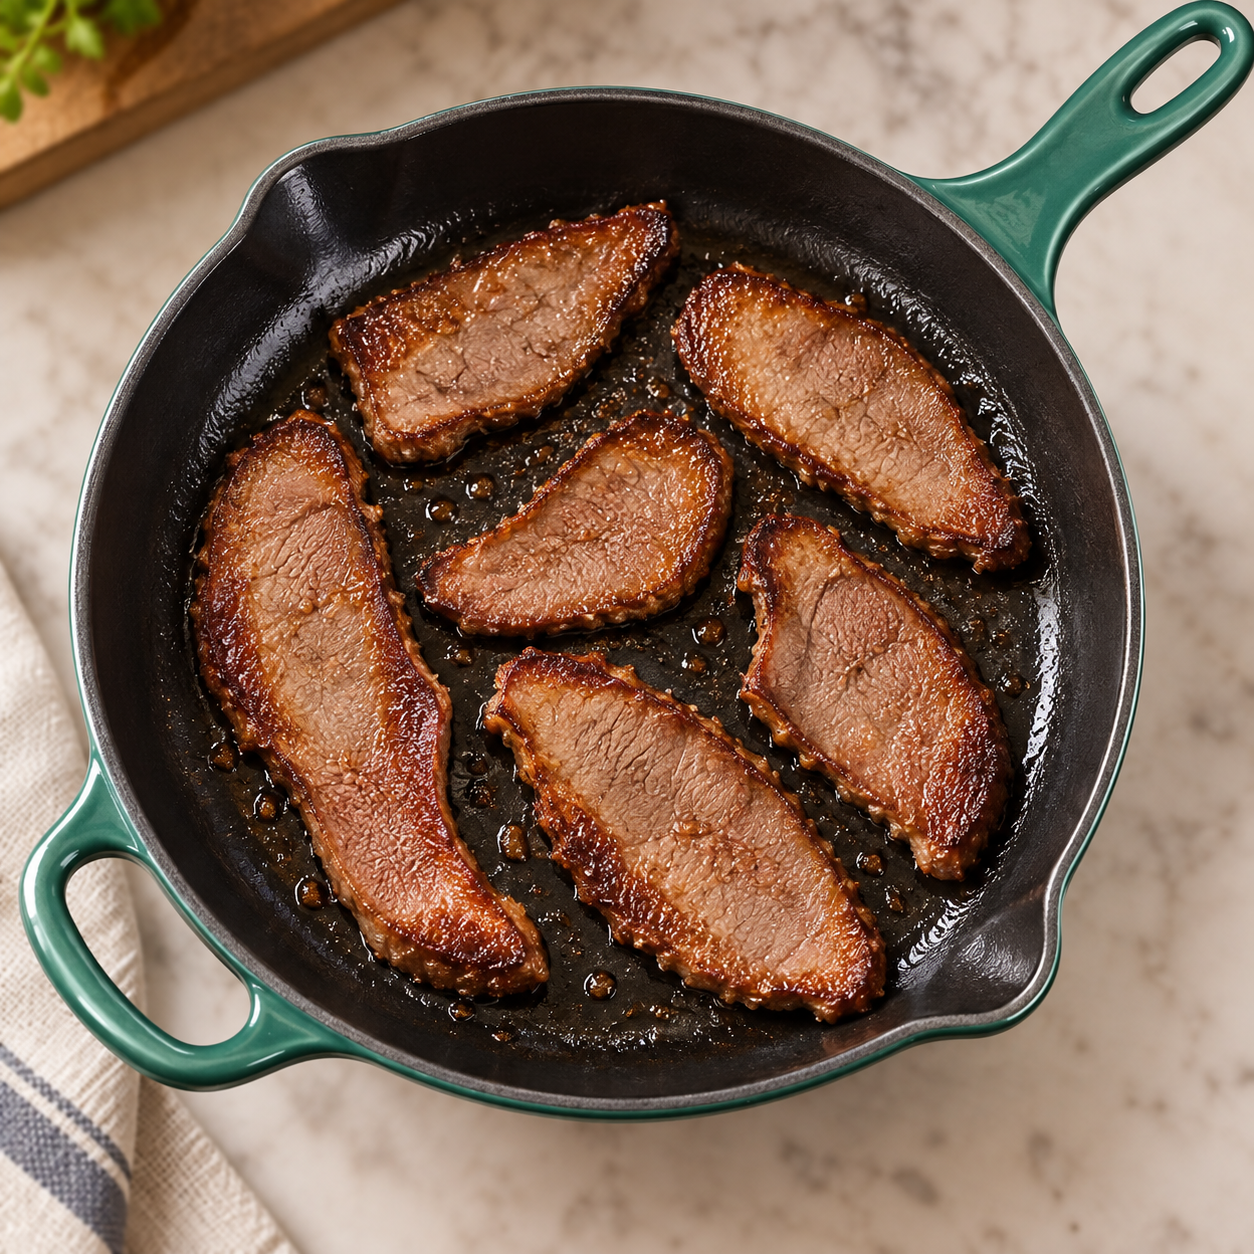
Season the first side with part of the remaining sea salt and any optional pepper, garlic powder, or cumin. Cook for five minutes, then reduce the heat to medium and cook for about three minutes more. Check one slice. The underside should be deep brown and crisp, and it should release from the enamel without tearing. Pale, wet slices need more time. Black, bitter ridges mean the heat is too high.
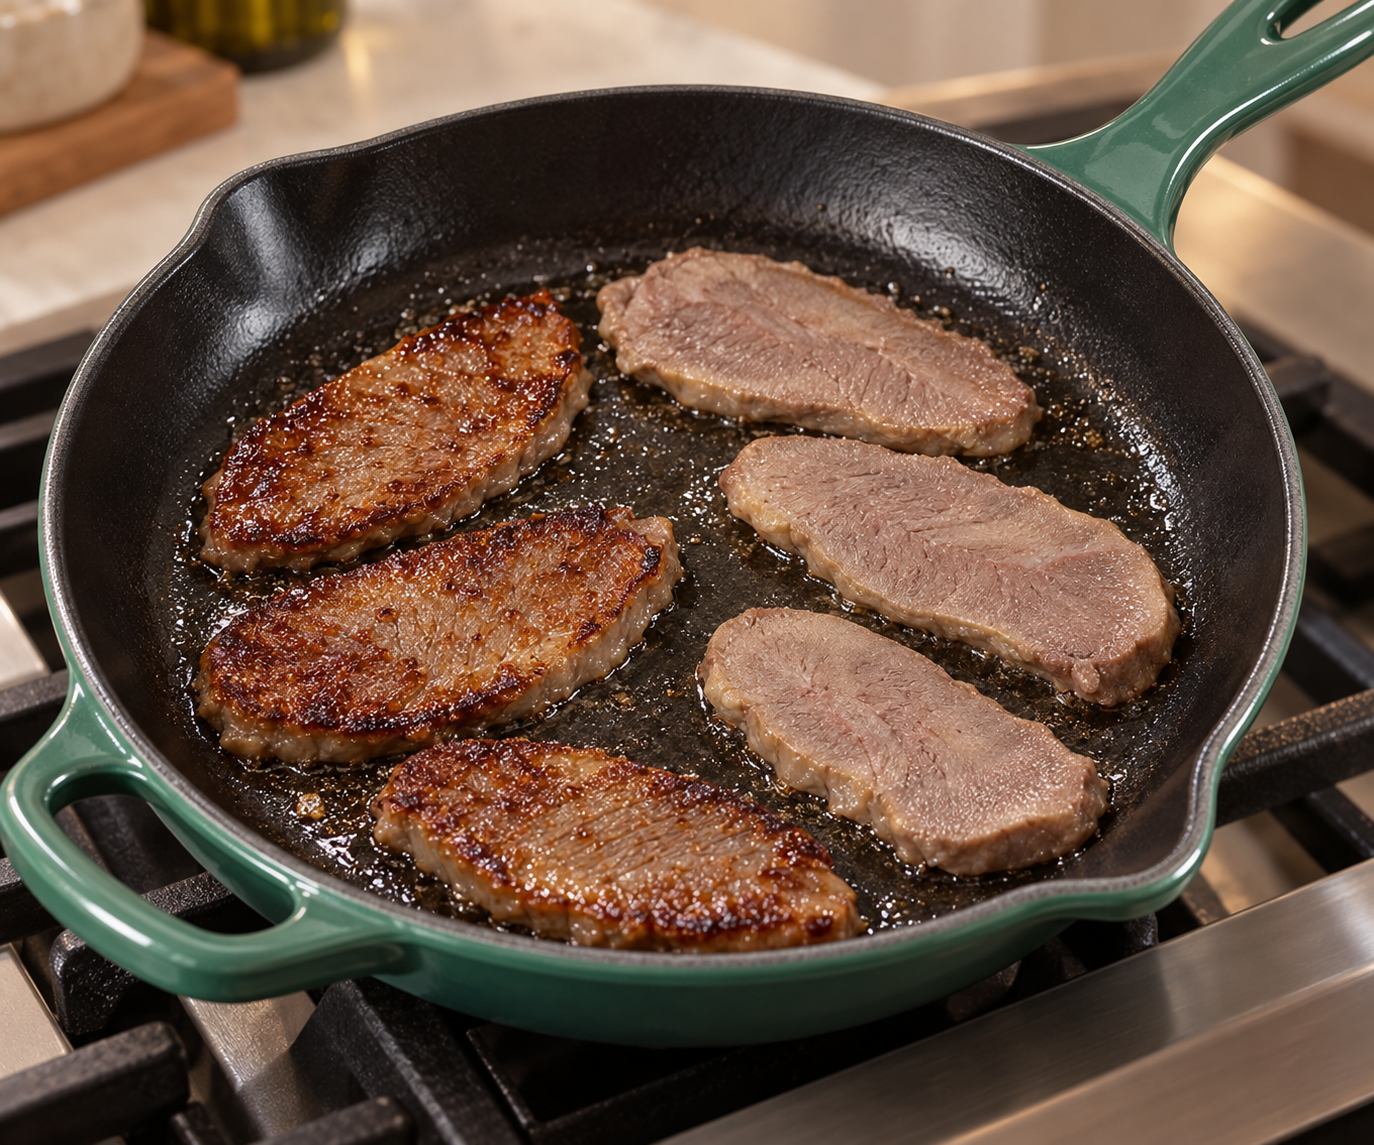
Turn each slice with tongs. Lightly season the second side and continue cooking until it is browned and crisp. Transfer the batch to a plate, add more tallow if the skillet looks dry, and repeat with the remaining tongue. Cut the finished slices into strips only after frying if that shape suits the meal better.
Crispy Beef Tongue for Full GAPS
Ingredients
Equipment
Method
- Choose one tenderizing route. For the pressure-cooker route, put the whole tongue and the measured filtered water into the stainless inner pot. Seal and use the Stew setting for 35 minutes. Let the pressure release fully and naturally before opening.
- For the stovetop route instead, put the tongue in a large stainless-steel pot, cover it with filtered water, and add the cooking-water portion of the measured salt. Bring to a boil, lower to a quiet simmer, and cook about 1 hour per pound, usually at least 3 hours, until a knife slides easily into the center.
- Lift out the tender tongue and cool only until comfortable to handle. Make a shallow cut through the outer skin and peel it away. Trim rough tissue at the base, then slice from the tip at a slight angle into pieces about 1/2 inch thick.
- Heat the Artichaut skillet over medium-high heat. Add enough of the measured tallow to form a thin film, then arrange a single uncrowded layer of tongue slices in the skillet.
- Season the first side with part of the remaining salt and any optional pepper, garlic powder, or cumin. Cook 5 minutes, lower the heat to medium, and cook about 3 minutes more. Turn when the underside is deep brown, crisp, and releases without tearing.
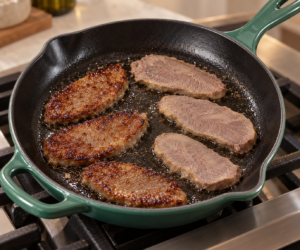
- Lightly season the second side and cook until browned and crisp. Transfer the batch to a plate. Add more tallow if the skillet looks dry and repeat in 2 to 3 total batches, keeping all salt within the measured range.
- Serve the crisp slices whole, or cut them into strips after frying for bowls, salads, eggs, or another Full GAPS plate.
Notes
Tried this recipe?
Let us know how it was!The Physical Cues That Matter
The center is tender before peeling. A knife enters the thickest part easily. A firm or springy center will stay chewy after frying.
The skin releases in broad pieces. Warm skin pulls away cleanly from the meat. Tight, tearing skin usually points to an undercooked tongue.
The slices are sturdy but yielding. They hold their half-inch shape on the board without feeling rubbery under the knife.
The skillet has a thin film of fat. Tallow glistens across the cooking surface. The slices are shallow-fried, not submerged.
The underside releases when crisp. A properly browned slice lifts without leaving its crust behind. Give pale slices more time before turning.
The finished center stays tender. The outside is crisp and savory; the inside remains moist. Dryness means the slices were too thin or stayed in the pan too long.
Make-Ahead And Storage
This recipe can pause after tenderizing. Cook and peel the whole tongue, cool it, cover it, and refrigerate it before slicing. Chilled tongue becomes firmer and especially easy to cut into even pieces. Crisp the slices when you are ready to serve them.
Keep finished leftovers covered and cold. Reheat them in a lightly greased skillet over moderate heat so the edges become crisp again. Gentle skillet reheating works better than adding water, which softens the browned surface.
For packed lunches or outings, keep the cooked tongue cold and pack accompaniments separately. Our family usually packs food or eats ahead for activities, and separated components keep a bowl or salad from becoming soggy before lunch.
Serving Ideas
Serve the crisp slices beside cooked vegetables or over Full GAPS Steamed Cauliflower Rice. For a bowl, add avocado, sliced radishes, fresh cilantro, and a spoonful of Kiwi Cucumber Verde Salsa.
If cultured dairy is already part of the eater’s Full GAPS routine, add 24-Hour Yogurt-Culture Sour Cream at the table. Keep the cold sour cream off the skillet so it stays thick and tangy.
For breakfast, place a few crisp strips beside eggs and a cooked vegetable. For dinner, build a platter with the beef tongue, cauliflower rice, salsa, avocado, and radishes so each person can assemble a plate without turning this recipe into another nested formula.
Frequently Asked Questions
Does Beef Tongue Taste Like Liver?
No. Its flavor is closer to rich beef than liver. The texture becomes tender after the first cook and crisp at the edges after frying.
Can I Make It Without A Pressure Cooker?
Yes. Cover the tongue with water, add two teaspoons sea salt, and simmer about one hour per pound until a knife slides easily into the center. Then peel, slice, and fry it.
When Should I Peel The Tongue?
Peel it after the first cooking stage while it is still warm enough for the skin to release easily but cool enough to handle.
Can I Chill It Before Frying?
Yes. Cook and peel the tongue, cool and refrigerate it, then slice and fry it later. Chilling firms the meat and makes even slices easier.
Is The Cooking Liquid Meat Stock?
No. This recipe cooks tongue in plain water. GAPS meat stock requires raw meaty bones or joints, so keep this liquid labeled as tongue-cooking liquid.
Why Is My Beef Tongue Chewy?
It was probably not tender enough before peeling, the slices were cut too thick, or the skillet stage ended before the surfaces browned. The first cook should make the center knife-tender.
Why Did The Slices Steam Instead Of Crisp?
The skillet may have been crowded, the slices may have carried too much surface moisture, or the pan may not have been hot enough when they went in. Work in two or three single-layer batches.
Recommended Equipment
Use an Instant Pot or another pressure cooker with a stainless-steel inner pot for the faster route, or a large stainless-steel stockpot with a lid for the stovetop route. For crisping, use the exact Le Creuset Signature 9-inch skillet in Artichaut, plus stainless-steel tongs, a stable wood cutting board, a sharp chef’s knife, and a rimmed plate or tray for cooked batches.
Learn Organ Meats Without Guessing
The upcoming Organ Meats Made Easy course is the most relevant next step for this recipe. It is designed to make unfamiliar cuts feel workable through clear prep order, physical cues, family-serving ideas, and practical ways to use what you buy. Check the WFLI shop for the current catalog and release updates.

Leave a comment