

These Goji-Cranberry Coconut Truffles have a soft ruby filling inside a thin cocoa shell. Cranberries simmer for three minutes, dried goji berries steam until plump, and both are blended with homemade coconut butter and raw honey before chilling and dipping.
The recipe makes forty truffles, which is enough for a full tray without making each piece oversized. They belong to occasional later Full GAPS, after digestive symptoms are gone and pure organic cocoa is already tolerated.
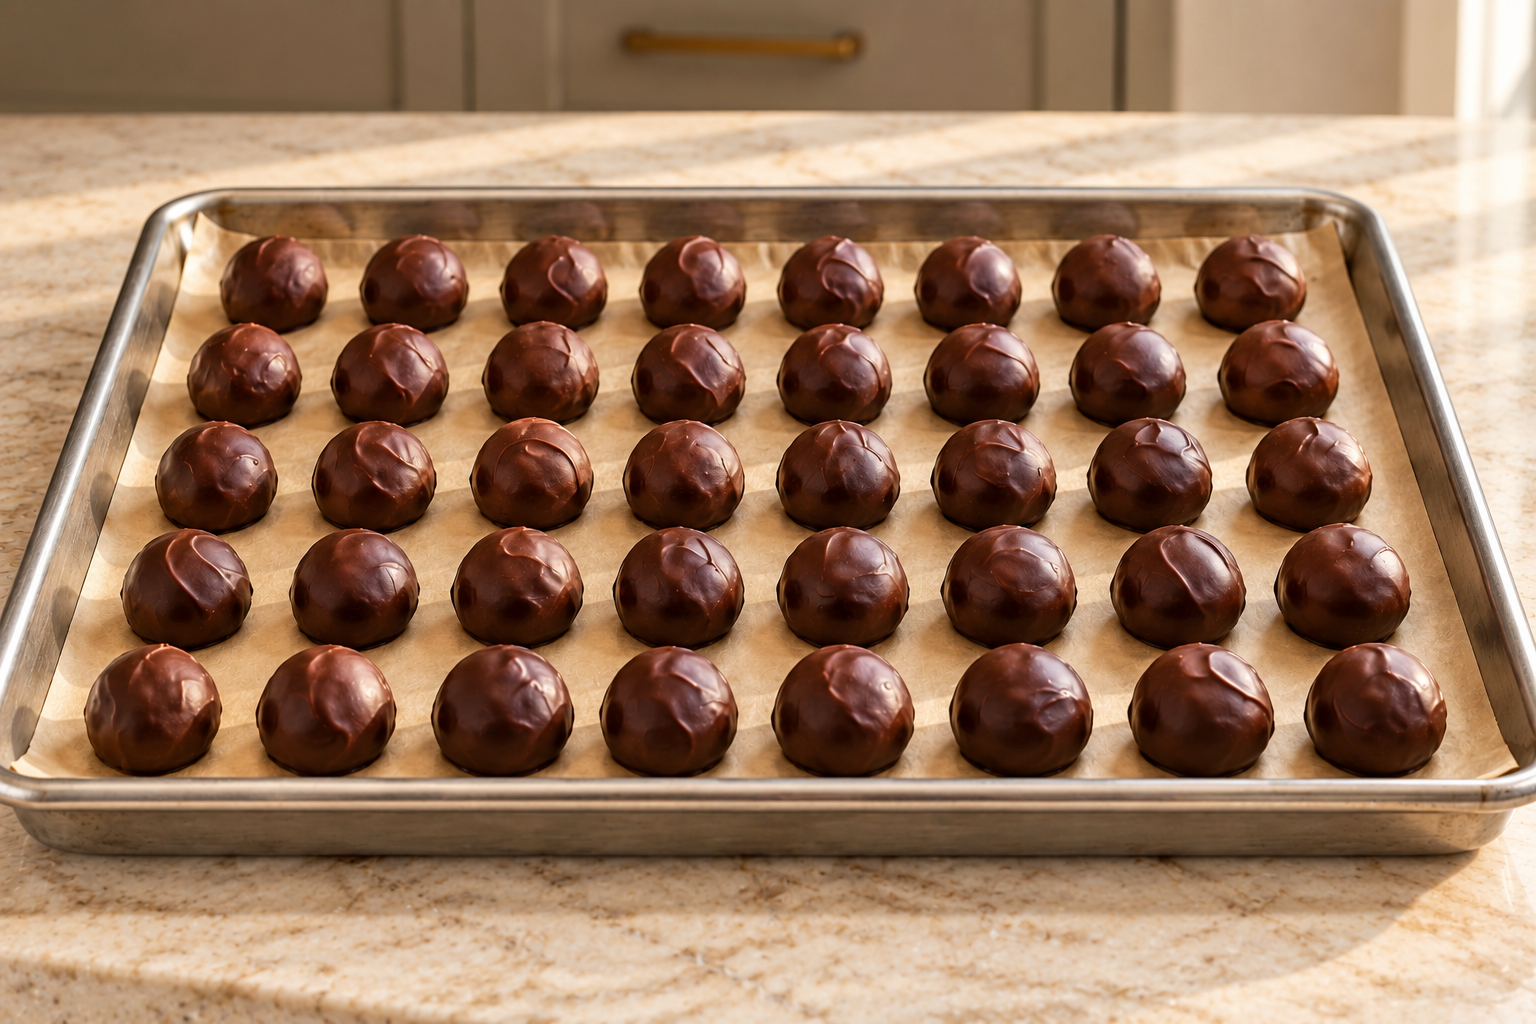
A Make-Ahead Treat for a Full House
A forty-piece recipe makes sense in our family when the work can happen before the day we need it. With six children, homeschooling and second-shift work, a freezer tray gives me a clear stopping point: shape the filling, freeze it, coat it and put the finished truffles away.
The size matters. These are small two-bite truffles, not cupcake-sized balls. Forty evenly sized mounds chill and coat more consistently than a mixed tray of large and small pieces, and the yield makes the scaling controls useful when a smaller or larger batch fits the week better.
Set the empty tray in the freezer space before starting. That small step matters in a busy kitchen: once the filling is shaped, you should be able to move the tray straight to a flat cold shelf without rearranging containers while the mounds soften.
Make the Coconut Components First
The filling uses one cup homemade coconut butter. The coating uses one-quarter cup homemade high-fat coconut milk. Make those components before starting so the berry mixture does not cool while you wait on another recipe.
Use coconut butter that is soft and creamy enough to blend. If it has become firm in a cool room, warm the closed container gently until it can be measured without melting it into separated oil. Stir the coconut milk before measuring so its fat and liquid are evenly distributed.
The homemade coconut butter should mound on the measuring cup but release with a spatula. The coconut milk should pour as one creamy liquid. If either component has a separate oil layer, stir it back together before measuring so the finished filling and shell receive the intended balance of coconut fat and solids.
Simmer the Cranberries, Then Plump the Goji Berries
Combine three-quarters cup cranberries and one-half cup filtered water in the registered stainless saucepan. Bring the mixture to a steady simmer over medium heat and cook for three minutes. The cranberry skins should split, the fruit should soften and the water should turn deep red.
Turn off the heat before adding one-quarter cup dried goji berries. Stir them into the hot cranberry liquid, cover the pan and let them steam for five minutes. Finished goji berries look fuller and feel pliable rather than dry and leathery.
Remove the lid and let the mixture cool completely to room temperature. Warm berries soften the coconut butter and change the thickness of the filling, so use the temperature cue rather than rushing to the food processor.
Blend the Ruby Filling Smooth
Put the cooled berries and their liquid into the food processor with the homemade coconut butter. Add two tablespoons raw honey, then the separate one-tablespoon measure. Keeping both source measures visible preserves the three-tablespoon filling total without confusing it with the quarter cup used in the shell.
Process until the filling is smooth and uniformly ruby. A thick mixture may form an air pocket around the blade. Stop the machine, clear the pocket with a wooden spatula and continue. Do not add extra water or oil to force it to move.
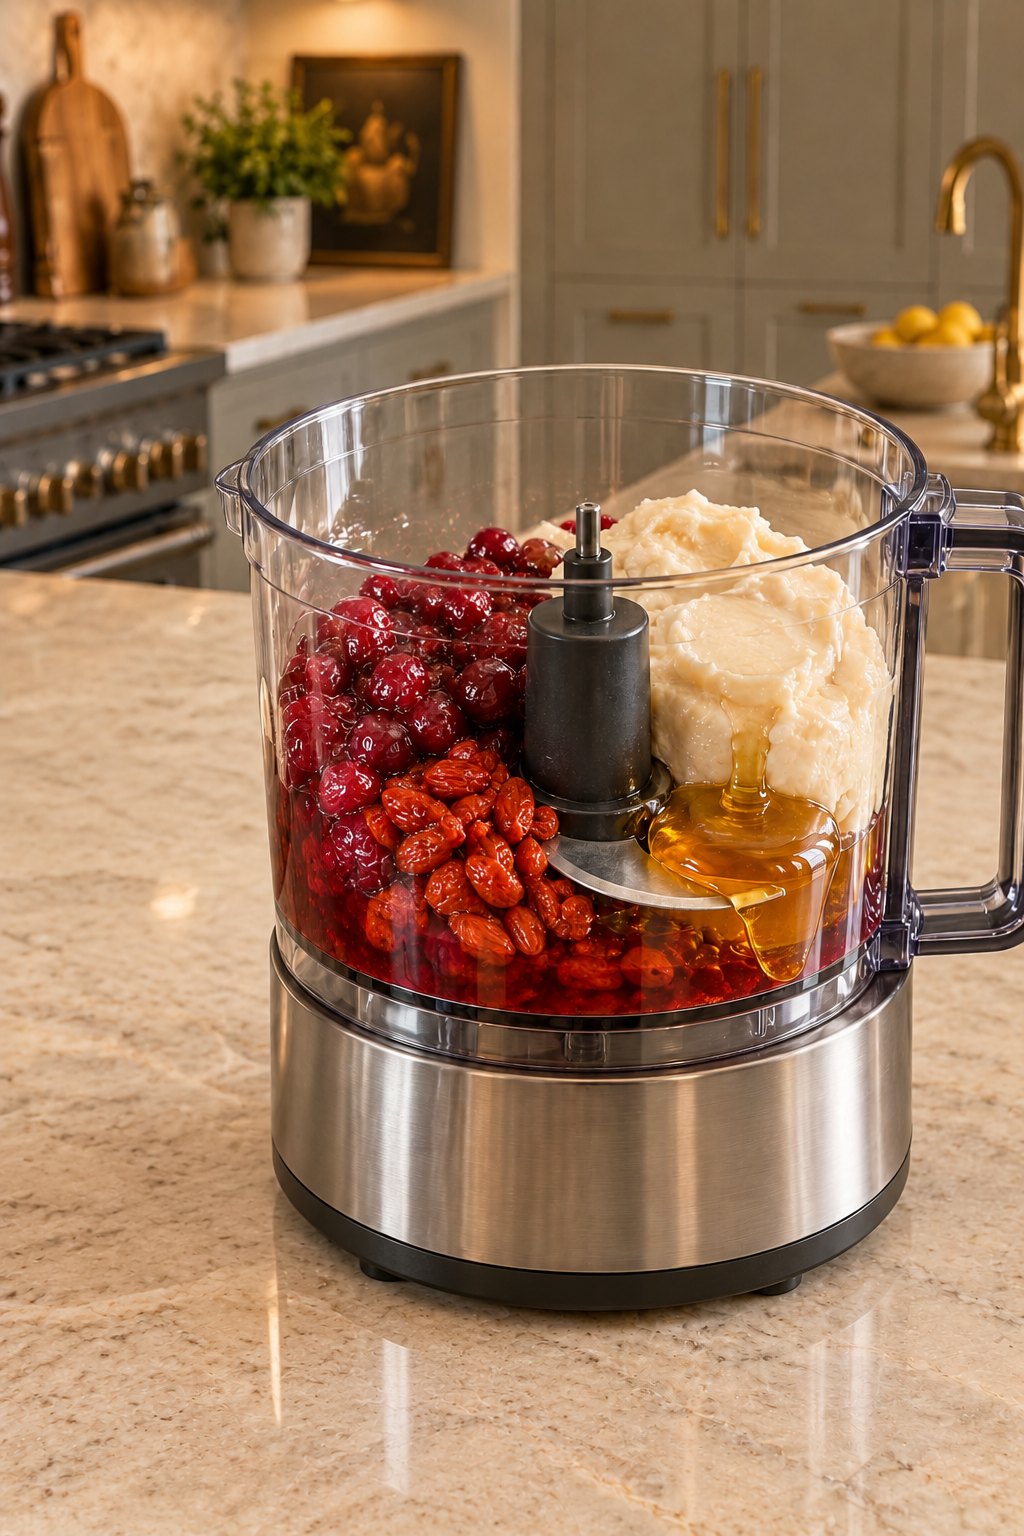
The finished filling should look dense and cohesive, with fine berry and coconut texture but no whole cranberries, dry goji berries or pale lumps of coconut butter. A spoon drawn through it should leave a ridge rather than a pool.
Scrape the processor wall and the space under the blade hub before deciding it is finished. Thick filling can look smooth at the top while dry goji pieces or coconut-butter streaks remain underneath. The color should be consistent from the center to the edge.
Chill and Shape Forty Mounds
Refrigerate the filling for fifteen minutes. It should become firm enough to scoop and roll while remaining soft through the center. Divide it into forty small rounded mounds on the parchment-lined tray.
Keep the mounds close in size. If the first pieces are much larger than the last, move a little filling between them before freezing. A consistent size helps every center firm at the same rate and keeps the coating-to-filling balance even.
Set the tray in the freezer while making the cocoa coating. The filling must be cold enough to stay on the forks when it meets the warm shell, but it does not need to freeze into a solid rock.
Whisk the Cocoa Coating Over the Lowest Heat
In the registered stainless saucepan, whisk together three-quarters cup pure organic cocoa, one-half cup melted coconut oil, one-quarter cup raw honey, one-quarter cup homemade coconut milk and the optional half-teaspoon homemade vanilla extract.
Place the pan over the lowest heat and whisk constantly for no more than about one minute. At first the coating may look stiff and dull. Remove it as soon as it loosens into a smooth, shiny, satiny liquid. Do not simmer or boil it.
Look along the bottom and sides of the saucepan. No dry cocoa should remain, and there should be no separate golden coconut-oil streak. A fork dipped into the coating should come up with a thin even layer rather than a thick clump.
Keep the heat low enough that the coating never bubbles. If steam or small simmering bubbles appear, remove the saucepan immediately and keep whisking off the heat. The goal is only to loosen the cocoa mixture for dipping, not to cook the honey or coconut milk.
Dip With Two Supported Forks
Balance one chilled filling mound between two stainless forks, lower it into the coating and turn until every red surface is covered. Let the excess drip back into the pan, then return the truffle to the parchment.
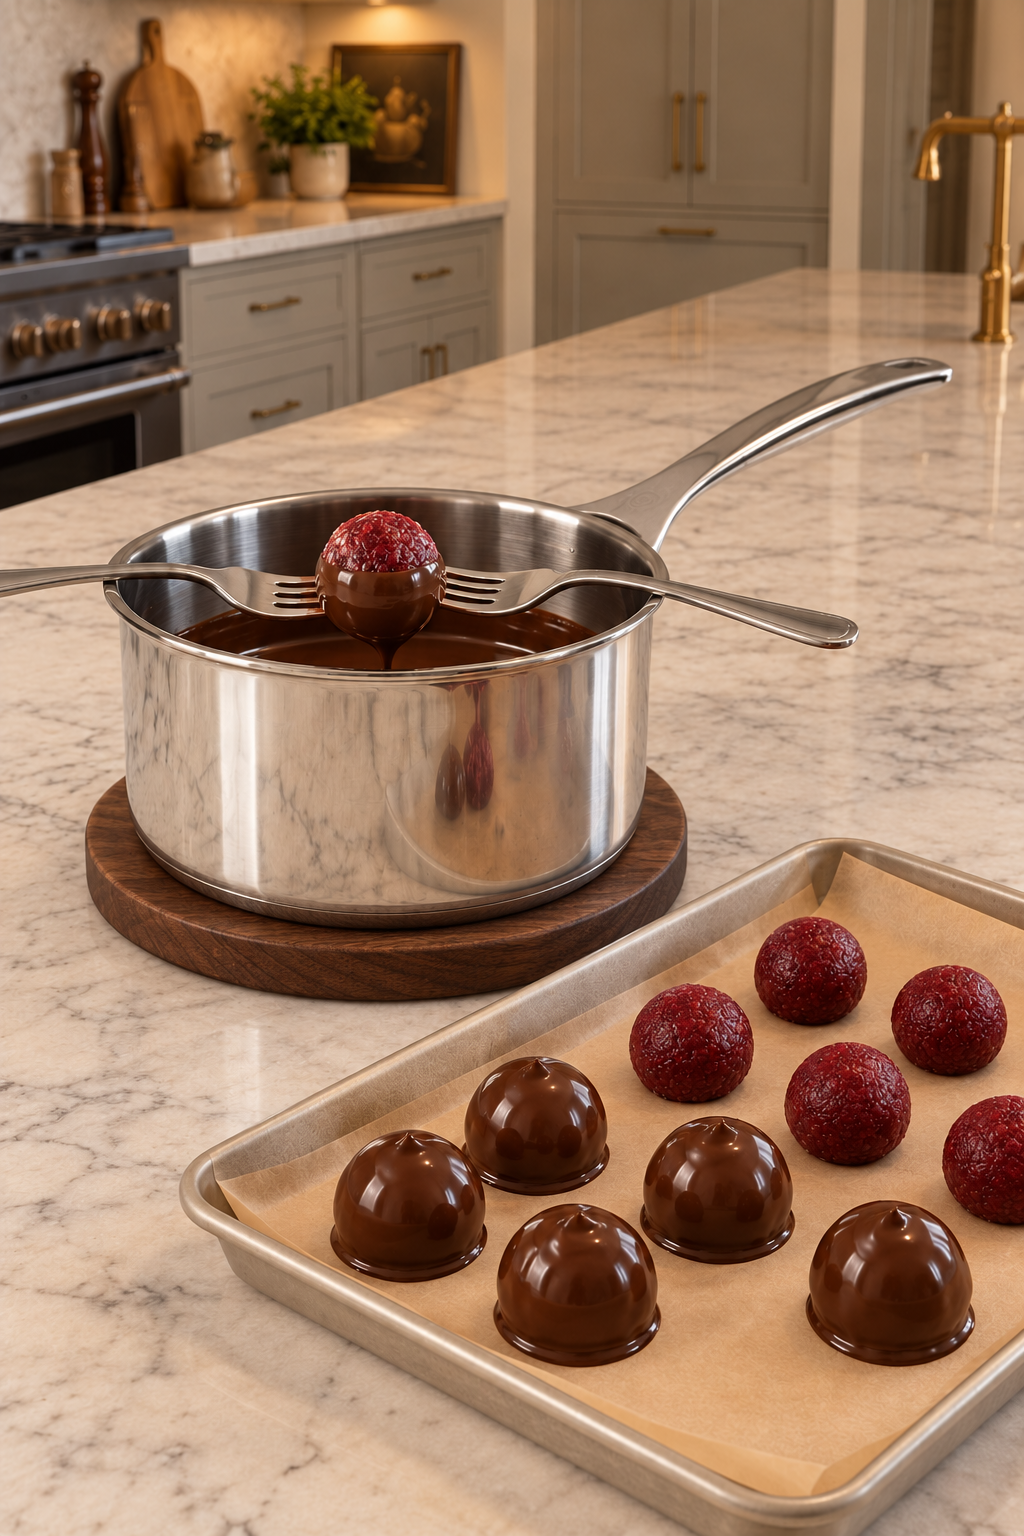
Work steadily. If the coating thickens before all forty are finished, return the saucepan to the lowest heat very briefly and whisk until it loosens again. Keep the pan on a heat-safe trivet whenever it is on the counter.
Let each coated truffle drip over the saucepan for a moment before returning it to the tray. A heavy puddle around the base means too much coating came with it. Lift that piece once the shell begins to set and move it to a clean patch of parchment rather than adding more cocoa to hide the excess.
This version does not use the decorative granulated-sweetener or goji garnish branches. The finished shell stays plain and smooth, which also makes the batch easier to identify as the raw-honey Full GAPS version.
What the Finished Truffles Should Be Like
The cocoa shell should set firm enough to lift cleanly without becoming thick or chalky. Cut one truffle after the batch sets. The shell should be thin and dark, while the center remains dense, smooth and deep cranberry-red with fine goji and coconut texture.
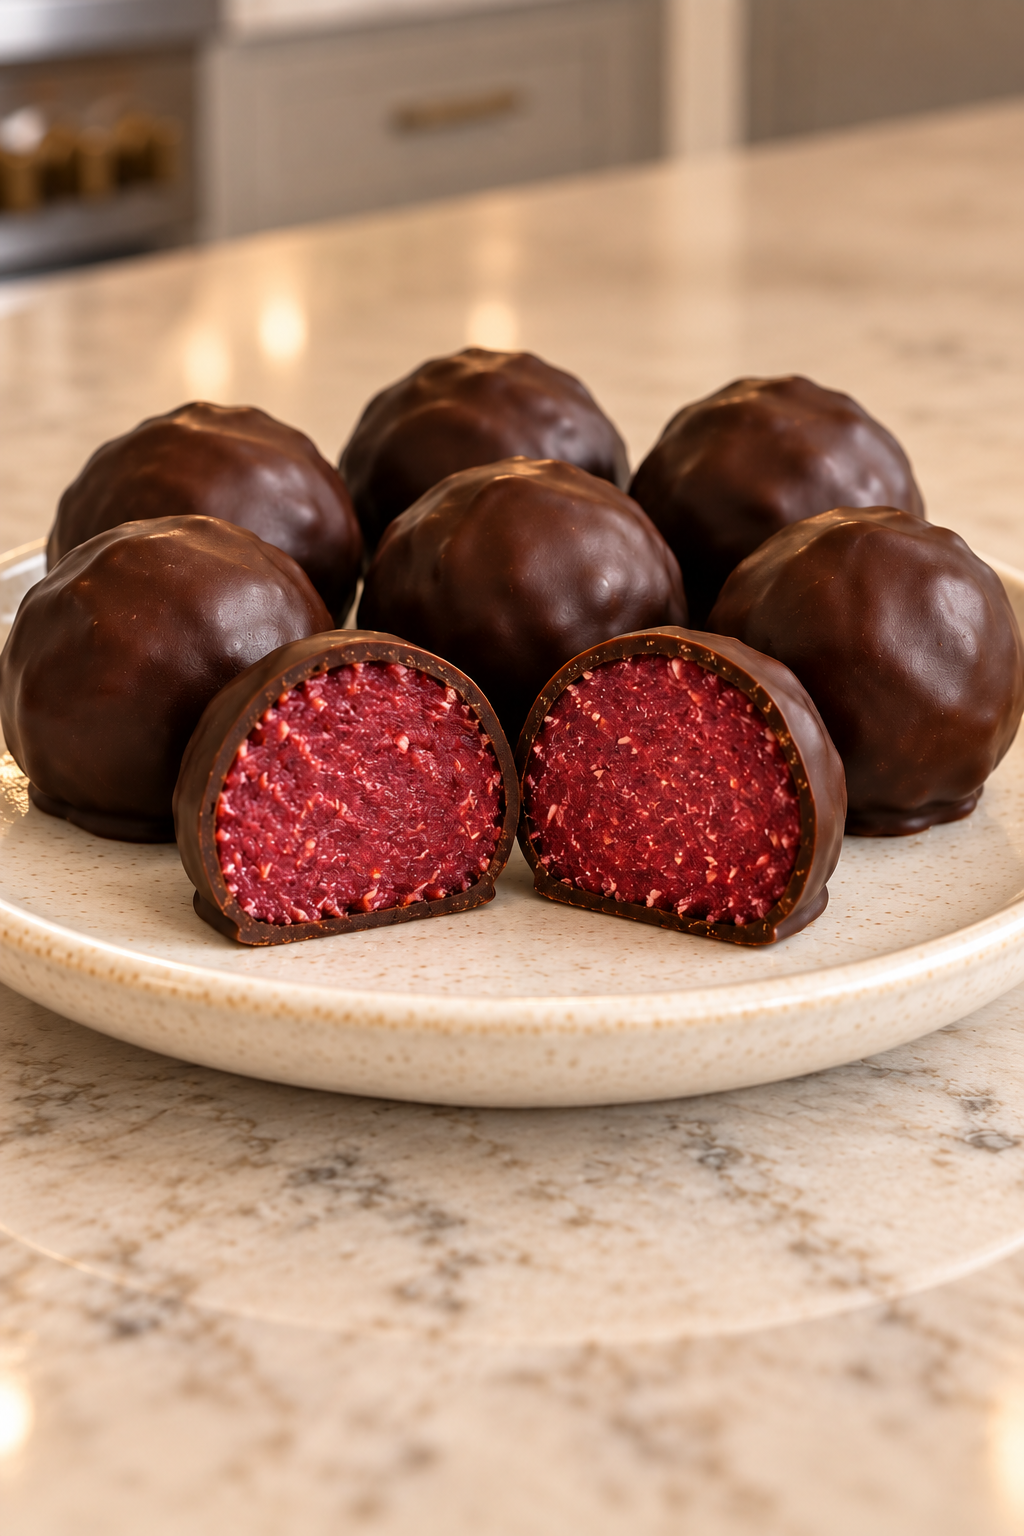
The first flavor is cocoa and raw honey, followed by tart cranberry, goji and coconut. The center should not taste like jam or contain wet fruit pockets. The shell should not leave an oily puddle on the plate.
Where These Truffles Fit on GAPS
These are an occasional later Full GAPS treat. Goji berries are allowed, but pure organic cocoa belongs only after digestive symptoms are gone and cocoa has been introduced successfully. This is not an Introduction Diet or early Full GAPS recipe.
Raw honey replaces erythritol, allulose, coconut sugar and maple syrup in every sweetener position. Homemade coconut butter and homemade coconut milk replace commercial coconut products whose ingredients or processing do not fit the recipe. Homemade vanilla is optional and linked above.
Storage
Freeze the tray until the shells are firm, then move the truffles to a covered glass or ceramic container. Store them well sealed in the refrigerator or freezer for several weeks, following the captured recipe.
Let frozen truffles sit briefly before serving so the center is biteable. Keep them cool enough that the coconut-oil shell stays firm. Return leftovers to cold storage rather than letting the tray cycle repeatedly between warm and frozen.
Separate layers with unbleached parchment if stacking is necessary. A shallow container keeps the shells from carrying the weight of several rows. Label the container so these later-Full-GAPS cocoa truffles are not confused with a non-cocoa snack intended for an earlier stage.
Recommended Equipment
Use the registered Le Creuset stainless saucepan, a lid, stainless whisk, food processor or approved blender, wooden spatula, stainless tray, unbleached parchment, measuring tools, two stainless forks and a covered glass or ceramic storage container.
Frequently Asked Questions
Can I Use Canned Coconut Milk?
No. Use the linked homemade high-fat coconut milk for this Full GAPS coating.
Why Are There Two Honey Measures in the Filling?
The recipe preserves separate two-tablespoon and one-tablespoon filling measures. Together they make three tablespoons.
Can I Use Maple Syrup or Allulose?
No. Raw honey fills every sweetener position in this Full GAPS version.
When Can Cocoa Be Used?
Pure organic cocoa is occasional later Full GAPS after digestive symptoms are gone.
How Do I Know the Coating Is Ready?
It changes from stiff and dull to loose, smooth, shiny and satiny over the lowest heat, without simmering.
How Many Truffles Does This Make?
The complete batch makes forty small truffles.
Goji-Cranberry Coconut Truffles Recipe
Goji-Cranberry Coconut Truffles for Full GAPS
Ingredients
Equipment
Method
- Line a stainless tray with unbleached parchment and clear a level space for it in the freezer.
- Combine the cranberries and filtered water in a stainless-steel saucepan. Bring to a simmer over medium heat and simmer for 3 minutes.
- Turn off the heat and stir in the goji berries. Cover and let them steam for 5 minutes, until plump and softened.
- Remove the lid and let the berry mixture cool completely to room temperature.
- Put the cooled berry mixture, homemade coconut butter, 2 tablespoons raw honey and the separate 1 tablespoon raw honey into a food processor or approved blender. Process until smooth, stopping to clear any air pocket around the blade with a wooden spatula.
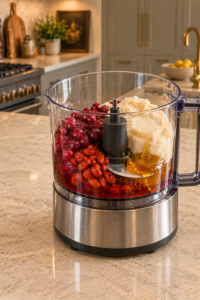
- Refrigerate the filling for 15 minutes, then scoop and roll it into 40 small rounded mounds on the lined tray.
- Freeze the tray while making the coating.
- Whisk the cocoa powder, melted coconut oil, raw honey, homemade coconut milk and optional homemade vanilla in the registered stainless-steel saucepan.
- Set the saucepan over the lowest heat for up to 1 minute, whisking constantly, just until the stiff mixture loosens into a shiny, smooth, satiny coating. Remove it from the heat immediately.
- Use two stainless forks to dip each chilled filling mound, turning it to coat completely. Return each truffle to the parchment. If the coating thickens, warm it again very briefly over the lowest heat while whisking.
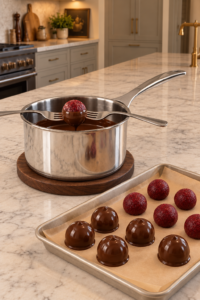
- Continue until all 40 truffles are coated. Do not add the non-GAPS sweetener or decorative garnish branches.
- Freeze until the shells are firm, then transfer the truffles to a covered glass or ceramic container for refrigerator or freezer storage.
Notes
Tried this recipe?
Let us know how it was!Keep More Full GAPS Treats Ready
The upcoming Sweet Snack Recipe Card Deck is designed for measured treats that can be prepared ahead and portioned without rebuilding the recipe every time. Find current resources and release updates in the WFLI shop.

Leave a comment