

Top round can make excellent roast beef, but it needs a different approach than a marbled chuck roast. This cut is lean. Give it a hard sear, finish it only to the temperature you want, rest it fully, and slice it thin across the grain. Those four choices are what keep it tender enough for dinner and cold slices the next day.
This Full GAPS version uses a short ingredient list: beef, natural sea salt, black pepper, and beef tallow or homemade ghee. There is no bottled seasoning mix, commercial broth, flour coating, or sweet glaze hiding the meat. The useful part is the method, especially the visual and temperature cues that tell you when to move from one step to the next.
In our household of eight, a roast is practical because one oven session can cover dinner and leave thin slices for another meal. That only works if the leftovers are still pleasant cold. Cutting the roast thick or pushing it past medium makes lean top round much less forgiving, so I would rather use a thermometer and get the endpoint right.
Where This Roast Fits On GAPS
This recipe fits Full GAPS after the individual ingredients are introduced and tolerated. It is not an Introduction Diet recipe. The method relies on browning the meat in hot fat and roasting it uncovered, while the early Introduction Diet focuses on gently cooked meats, soups, and homemade meat stock.
Use plain fresh beef with no injected solution, tenderizer, flavor packet, sugar, starch, or preservatives. The cooking fat should be a traditional GAPS fat such as beef tallow or ghee. Natural sea salt and plain black pepper finish the formula.
Why Top Round Needs Thin Slices
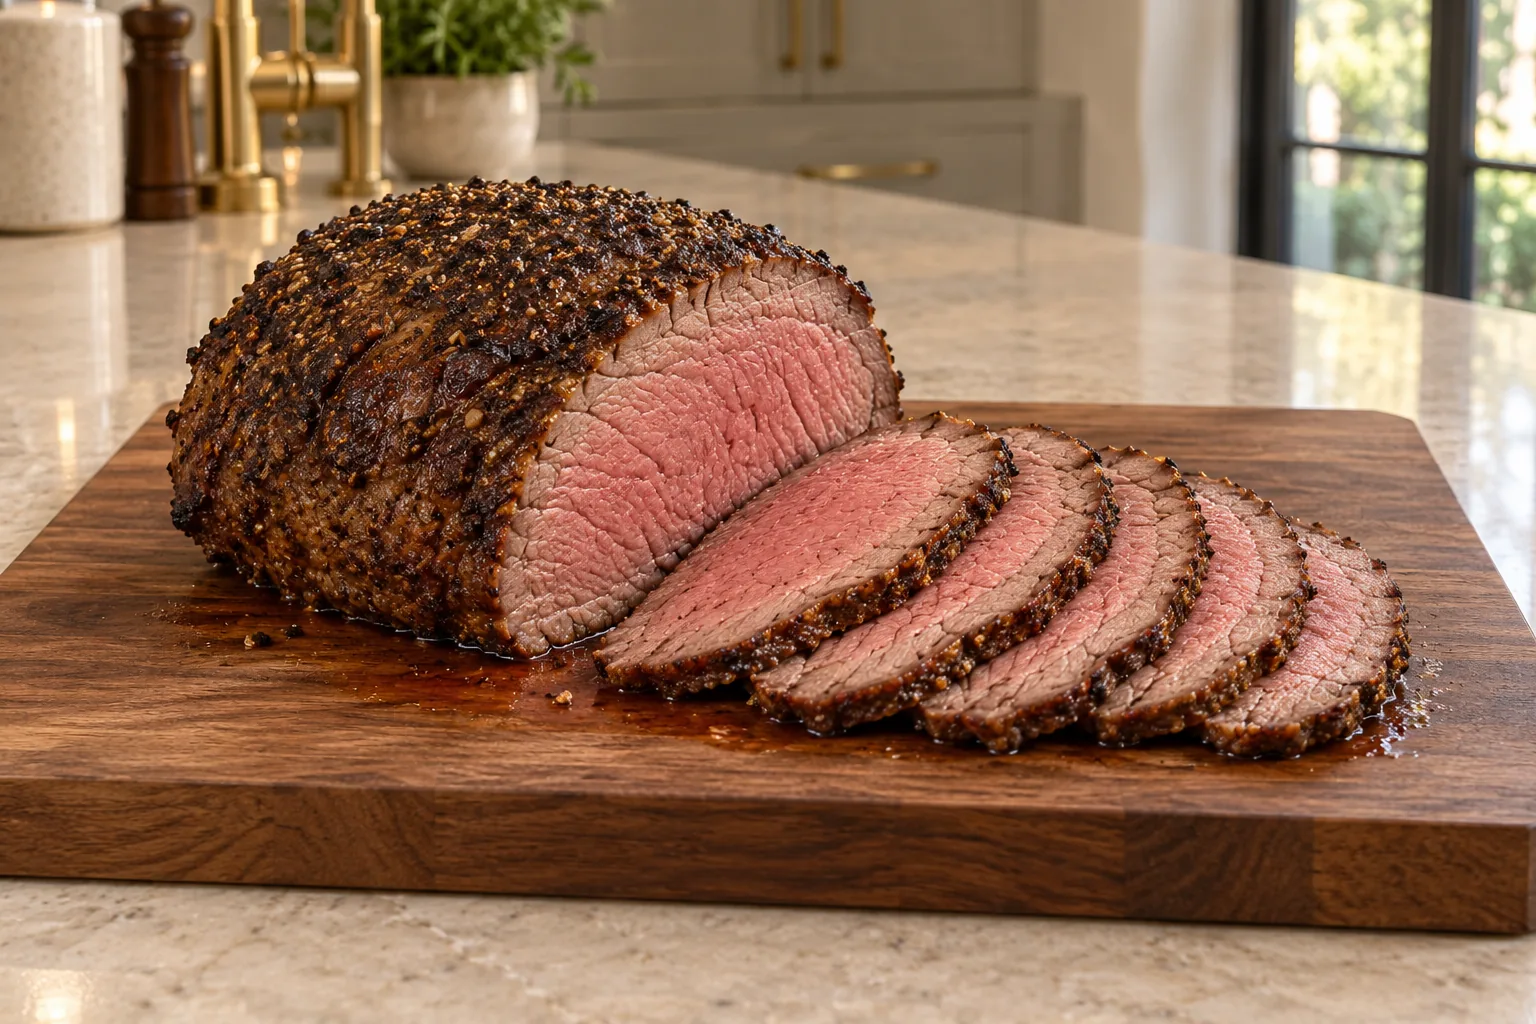
Top round comes from the rear leg of the animal. It is lean and has long, visible muscle fibers. Those fibers are why the direction of the knife matters. Look at the cut face before you slice. The grain appears as parallel lines running in one direction. Turn the roast so your knife crosses those lines instead of following them.
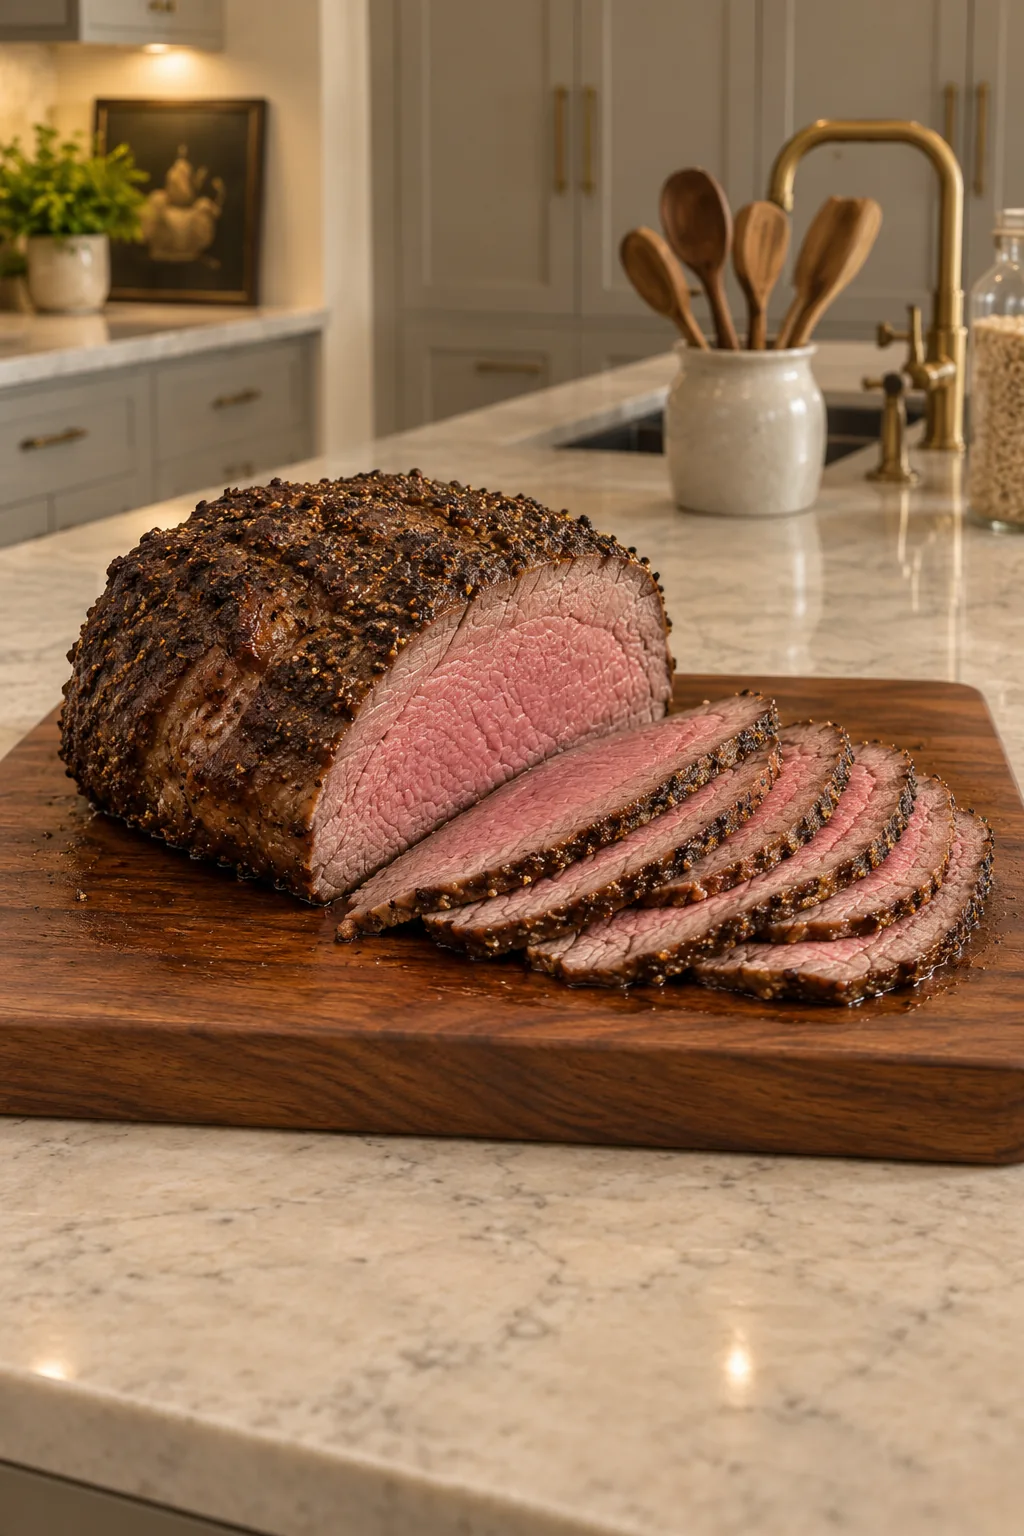
A thin cross-grain slice shortens the fibers you have to chew. Aim for about 1/8 to 1/4 inch. A sharp slicing knife helps more than sawing back and forth with a dull blade. If the warm roast feels too soft to cut cleanly, let it rest a few minutes longer.
Choose The Roast And Tie It Evenly
Use a 2- to 4-pound top round roast with an even thickness from end to end. A tapered roast can still work, but the narrow end will cook faster. Folding a thin flap underneath and tying the roast into a compact shape gives you a more even center.
Set the beef out for about one hour before cooking so the outer surface loses its refrigerator chill. Pat it completely dry. Moisture on the surface has to steam away before browning can begin, which makes it harder to develop a proper crust without overcooking the meat underneath.
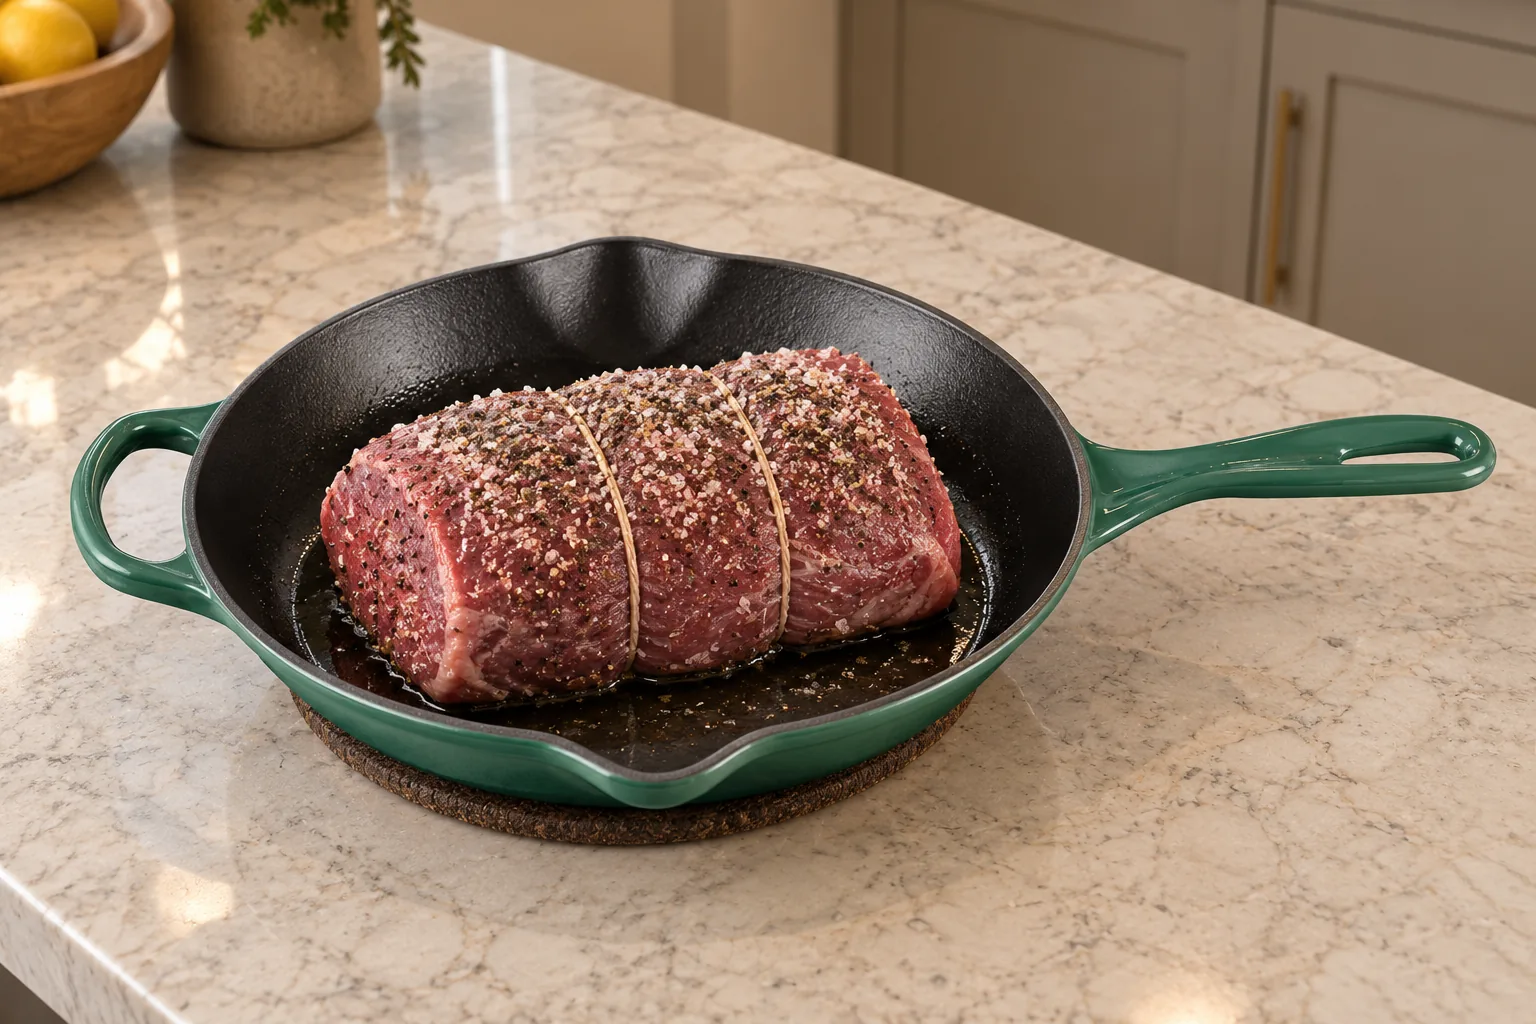
Wrap butcher’s twine around the roast in two or three evenly spaced places. The twine should hold the shape without cutting deeply into the meat. Season all sides with 2 to 3 teaspoons natural sea salt and 1 teaspoon black pepper, pressing the seasoning onto the surface.
Sear Until The Surface Is Deep Brown
Heat a 10- to 12-inch oven-safe skillet over medium-high heat, then add the beef tallow or ghee. The fat should look loose and glossy, with the first faint shimmer across the surface. If it smokes aggressively, lower the heat before adding the roast.
Place one broad side of the roast in the skillet and leave it alone for 2 to 3 minutes. Do not keep nudging it. When the meat releases without tearing and the contact side is a deep brown rather than pale gray, rotate it to the next side. Brown both broad sides and the two ends. Hold an end against the pan with tongs only long enough to color it.
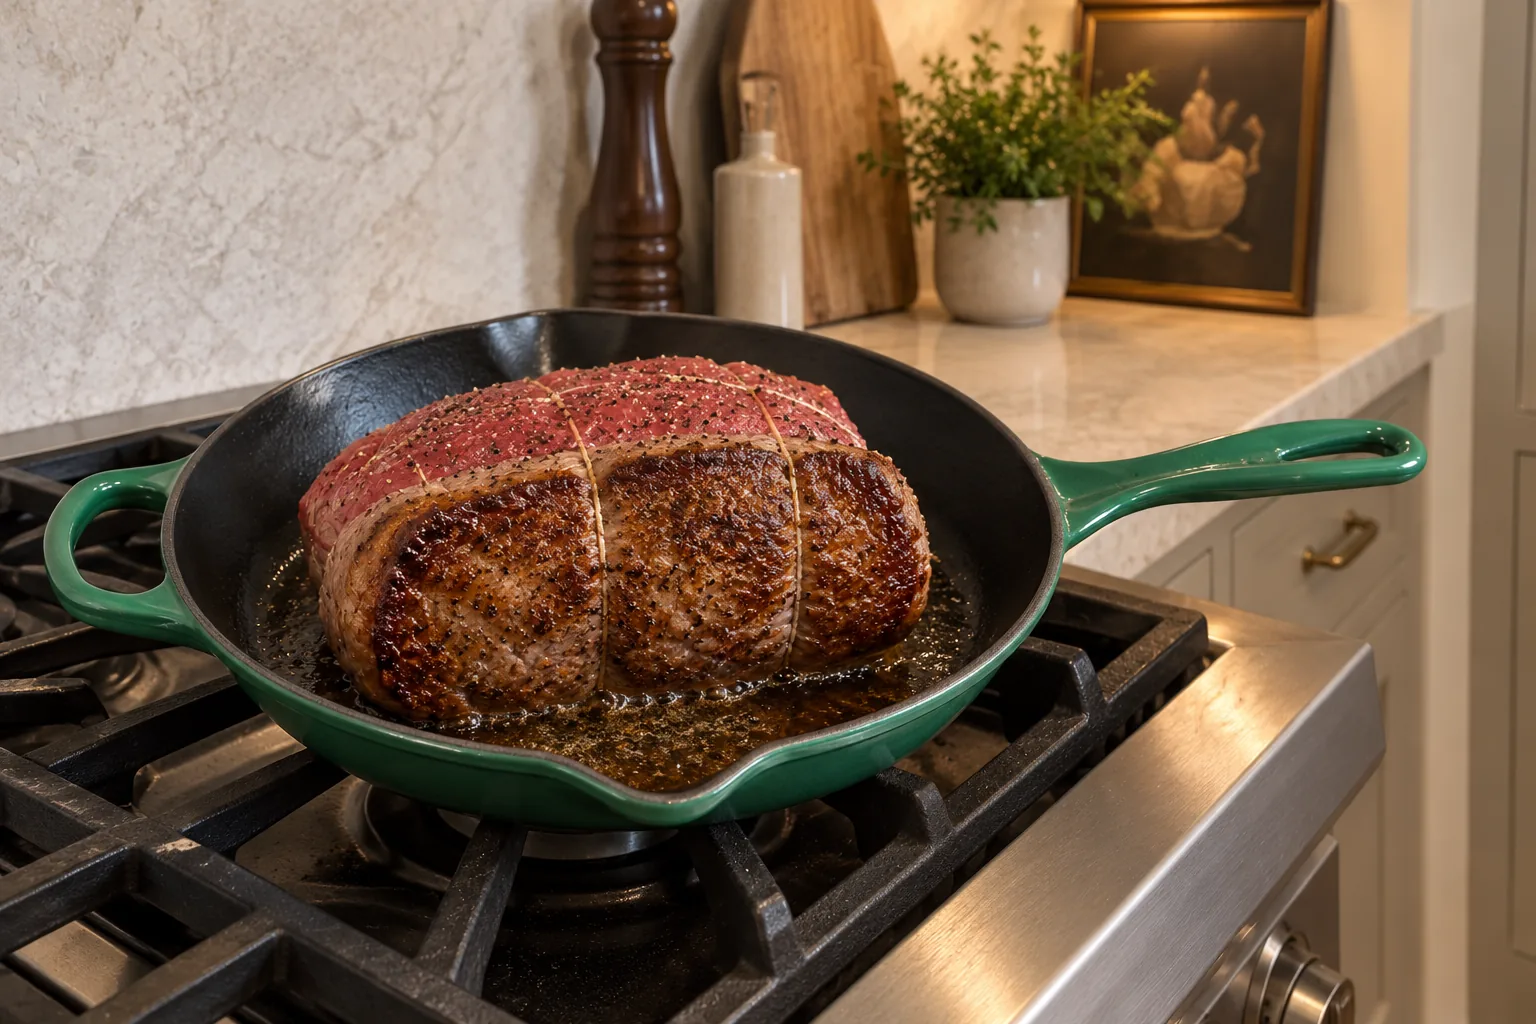
Set the roast right side up in the skillet. The crust should look dry and dark brown in patches, while the center is still raw. Move the skillet straight into a 375°F oven.
Read The Crust Instead Of The Clock
Two to three minutes per side is a useful starting range, but the surface gives you the better answer. A properly browned side looks dry, deeply colored, and slightly uneven. It should not look wet and gray. If the beef is still stuck firmly to the skillet at two minutes, give it another 20 to 30 seconds before trying again. Once a crust forms, it usually releases more easily.
Watch the fat while you work. A quiet, steady sizzle is right. Violent spattering or dark smoke means the skillet is too hot, while a silent pan usually means it cooled too far. Adjust the burner between sides if needed. The goal is a brown crust on the meat, not burned pepper and blackened fat in the bottom of the pan.
Leave the browned bits and clear fat in the skillet when it goes into the oven. They help flavor the roast and become the base for the separate pan-jus recipe. If the drippings smell scorched, do not turn them into sauce. A clean brown fond tastes savory. Black, bitter residue will stay bitter after liquid is added.
Roast To Temperature
Begin checking a 3-pound roast after about 20 minutes. Insert an instant-read or probe thermometer horizontally into the thickest part so the tip reaches the center. Pull the roast at 125°F for rare or 140°F for medium. A three-pound roast may take about 30 minutes, but the thermometer controls the endpoint because shape and starting temperature change the timing.
Do not wait for the surface to look more cooked. The outside is already browned from the skillet, so appearance will not tell you what is happening in the center. Temperature will.
Rest Before Slicing
Transfer the roast to a plate or cutting board and tent it loosely with foil. Rest it for at least 15 minutes. A tight foil wrap traps steam and softens the crust, while cutting immediately sends more juice onto the board and makes thin slices harder to manage.
Remove the twine, identify the direction of the grain, and slice across it. Serve the slices warm. If you want a simple sauce made from the browned pan drippings, use the separate Beef Pan Jus for Full GAPS. Keeping the jus in its own post gives it a complete measured card and makes it easier to use with other roasts.
Serving Ideas
Serve this roast with a cooked Full GAPS vegetable that will catch a little of the meat juice. Blanched Green Beans give you a quick stovetop side, while Roasted Delicata Squash Slices can share the oven once the beef comes out to rest.
For a different cut with a slower, lower oven method, the Sirloin Tip Roast Beef remains a separate recipe. Do not swap the temperatures and timing between the two cards just because both are lean roasts.
Storage And Reheating
Cool leftover roast within two hours and refrigerate it in a covered container for up to three days. Store the roast whole when possible and slice only what you need. A larger piece loses moisture more slowly than a stack of exposed slices.
Thin cold slices work well for lunch. To reheat without cooking the pink center gray, place slices in a covered skillet with a spoonful of homemade beef meat stock over low heat just until warm. Do not boil them.
Recommended Equipment
- 10- to 12-inch oven-safe skillet, such as the Le Creuset Signature cast-iron skillet in Artichaut
- Instant-read or oven-safe probe thermometer
- Butcher’s twine
- Long stainless-steel tongs
- Sharp slicing knife
- Large cutting board with a juice groove
Frequently Asked Questions
Can I Use Bottom Round Or Eye Of Round?
The source method also names bottom round and eye of round as options, but they are not identical cuts. This card is locked to top round so the title, photos, and texture cues stay specific. Use the temperature endpoint rather than assuming another cut will finish on the same minute.
Do I Have To Bring The Roast To Room Temperature?
Let it sit out for about one hour. The goal is to take off the refrigerator chill, not to leave raw meat out for an afternoon. Pat the surface dry immediately before seasoning.
Why Did My Roast Turn Out Tough?
The usual causes are cooking a lean roast too far, skipping the rest, or slicing with the grain. Check the center with a thermometer, rest at least 15 minutes, and cut thinly across the visible fibers.
Can I Skip The Sear?
The sear is part of this formula. It develops the browned crust before the roast goes into the oven. Skipping it creates a different exterior and removes the pan drippings used for the linked jus.
Can I Make This Ahead?
Yes. Roast and rest it, cool it promptly, and refrigerate it whole. Cold beef is easier to slice very thin. Serve the slices cold or warm them gently with a small amount of homemade beef meat stock.
Can I Double The Recipe?
Use the WPRM 2× control for doubled ingredient amounts, but roast two separate pieces rather than tying them together. Give each roast enough skillet contact to brown properly, and check each center independently.
Beef Top Round Roast Recipe
Beef Top Round Roast for Full GAPS
Ingredients
Equipment
Method
- Set the roast out for about 1 hour to take off the refrigerator chill. Heat the oven to 375°F. Pat the beef completely dry. Tie it with 2 or 3 evenly spaced loops of butcher’s twine if needed, then season every side with 2 to 3 teaspoons natural sea salt and 1 teaspoon black pepper.
- Heat a 10- to 12-inch oven-safe skillet over medium-high heat. Add the beef tallow or ghee. When the fat looks loose and glossy with the first faint shimmer, place one broad side of the roast in the skillet.
- Leave the beef undisturbed for 2 to 3 minutes, until the contact side is deep brown and releases without tearing. Brown the opposite broad side and both ends, adjusting the heat to keep a steady sizzle without heavy smoke.
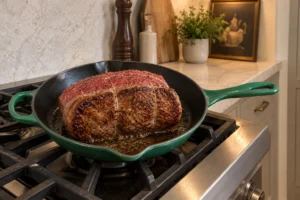
- Set the roast right side up and move the skillet to the oven. Begin checking a 3-pound roast after about 20 minutes. Insert the thermometer horizontally into the thickest part. Remove the roast at 125°F for rare or 140°F for medium.
- Transfer the roast to a plate or cutting board and tent it loosely with foil. Rest for at least 15 minutes. Remove the twine, identify the direction of the grain, and slice 1/8 to 1/4 inch thick across the grain.
Notes
Tried this recipe?
Let us know how it was!Use More Of The Beef You Buy
The upcoming Whole-Animal Buying & Cut Sheet Guide helps you plan where roasts, bones, trim, and cooking fat fit before a freezer order arrives. Find current releases and upcoming additions in the WFLI shop.

Leave a comment