

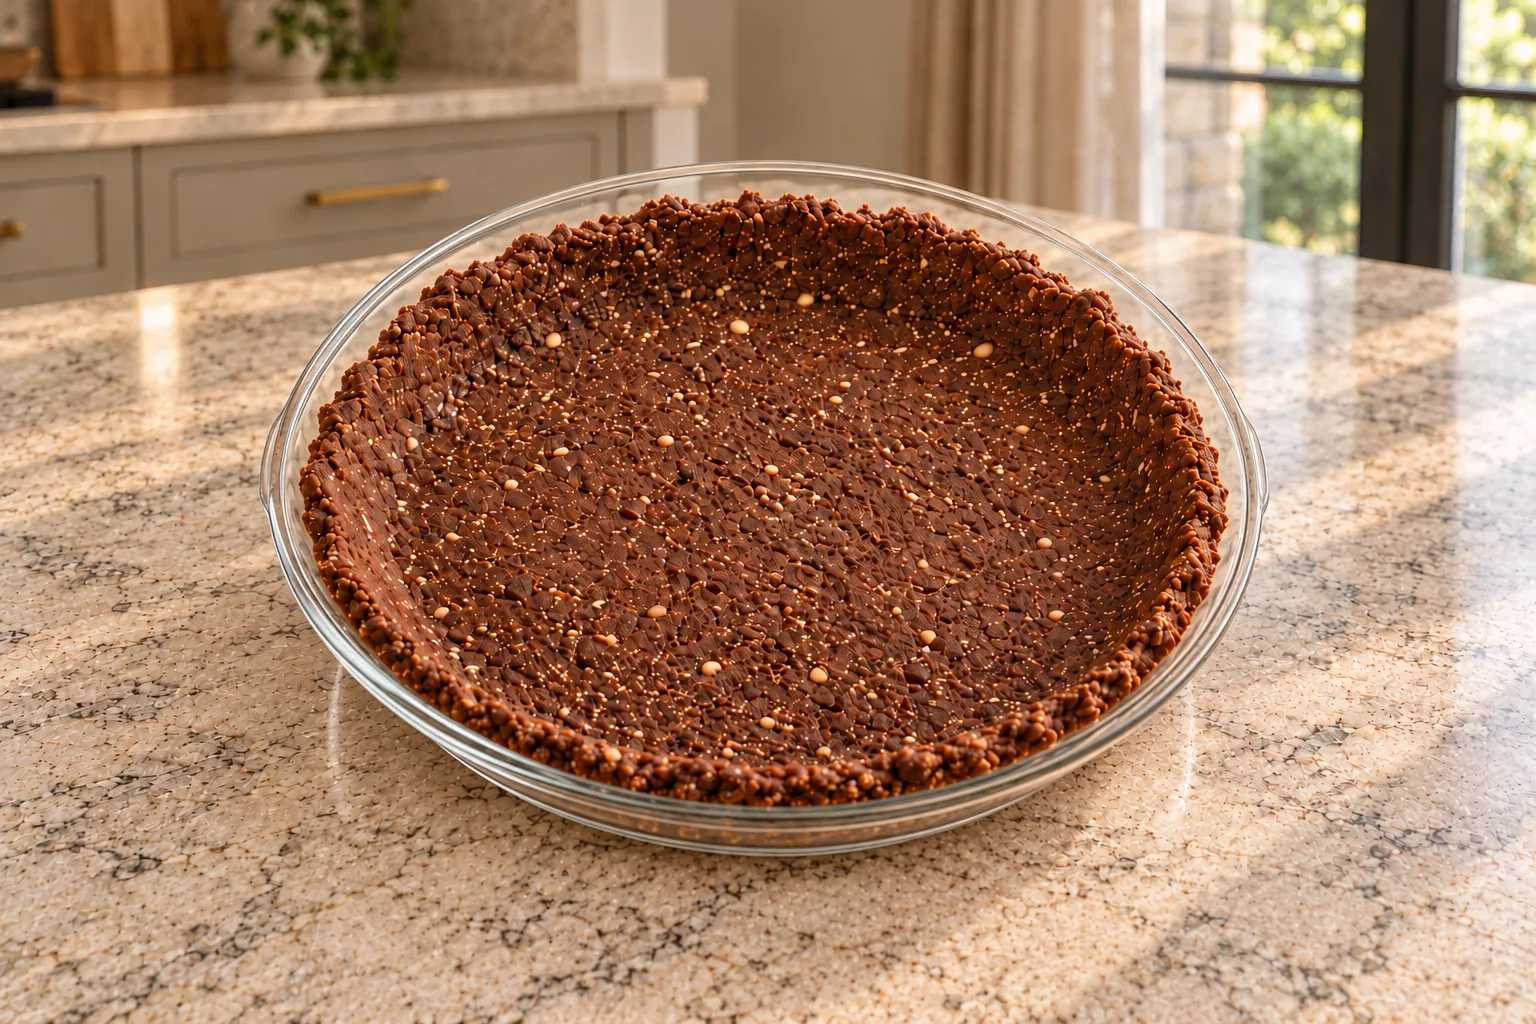
A chocolate pie needs a crust that holds the filling without turning into a hard, baked cookie. This one is pressed into a pie plate, not rolled, and the chocolate flavor comes from cocoa mixed with almond flour. The finished shell has a thin, level bottom and a slightly uneven wall. It is ready to receive a chilled filling without any oven time.
That simple sequence matters on a busy day. I am a working, homeschooling mom of six, and I would rather see the right texture in a bowl than guess whether a dough is “done.” Here, you can tell by looking and touching: the dry mixture is powdery, the moistened mixture forms small clumps when pressed, and the crust stays where you press it into the dish. No pastry rolling or decorative edge is required.
This is a later Full GAPS dessert component. Cocoa is reserved for the later part of the program, after digestive symptoms have gone, and almonds should be properly prepared before they are ground into flour. It is not an Introduction Diet crust. Make the shell first; a chilled chocolate-cashew filling can be added afterward.
What Makes This A No-Bake Crust
Almond flour supplies the body, while cocoa gives the crust its dark color and chocolate flavor. Solid coconut oil and raw honey bind the dry ingredients. The small amount of ice water moistens the crumbs just enough to press them into a pie dish. There is no egg, wheat flour, starch, refined sugar, or baking step in the measured recipe.
Do not expect a stretchy dough. Before it is pressed, the mixture should still look granular. That is useful: a wet, smooth paste would be harder to spread thinly and could give you a heavy base. A spoonful squeezed between your fingers should hold briefly, then break into small pieces when you rub it apart. The pie plate gives it its final shape.
Use a 9½-inch pie pan so the measured ingredients cover the bottom and sides at the intended thickness. A much smaller plate will produce an unusually thick wall; a much wider one may leave the side too thin. A clear glass plate makes it easy to see whether the base is even, though a similarly sized sturdy pie dish can serve the same purpose.
Choose The Almond Flour And Cocoa
Start with 1½ cups of flour ground from properly prepared almonds. Our homemade fermented almond flour explains one prepared-almond route. The flour should be dry enough to separate into fine grains before it meets the oil and honey. If it arrives in a compressed lump, break it up while measuring so that cocoa can distribute through the whole bowl.
Measure three tablespoons of pure cocoa powder. Use a plain ingredient without added sugar, starch, emulsifiers, flavoring, or a drink-mix label. Cocoa is not an early GAPS ingredient. In the 2020 Gut and Physiology Syndrome guidance, chocolate and cocoa are reserved for later, after digestive symptoms have disappeared. This crust is therefore an occasional later Full GAPS option, not a shortcut for an earlier stage.
The quarter teaspoon of mineral salt is small but worth measuring; it keeps the cocoa from tasting flat. Measure the coconut oil while solid for the quarter cup in this crust. Raw honey adds sweetness and helps the crumbs stay together. The last two teaspoons are ice water, not two tablespoons. Pouring in extra water to make a conventional dough would change the texture.
Mix The Dry Ingredients First
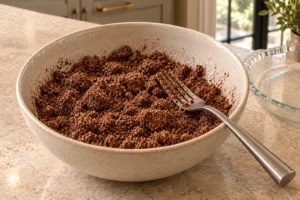
Put the prepared almond flour, cocoa and salt in a broad bowl. Whisk until the color is even. At this point the mixture should be dry and matte, with no dark mound of cocoa hiding at the bottom. Lift a little with the whisk or a fork and let it fall: it should scatter back into the bowl rather than cling together. This is the cue shown in the first process photo.
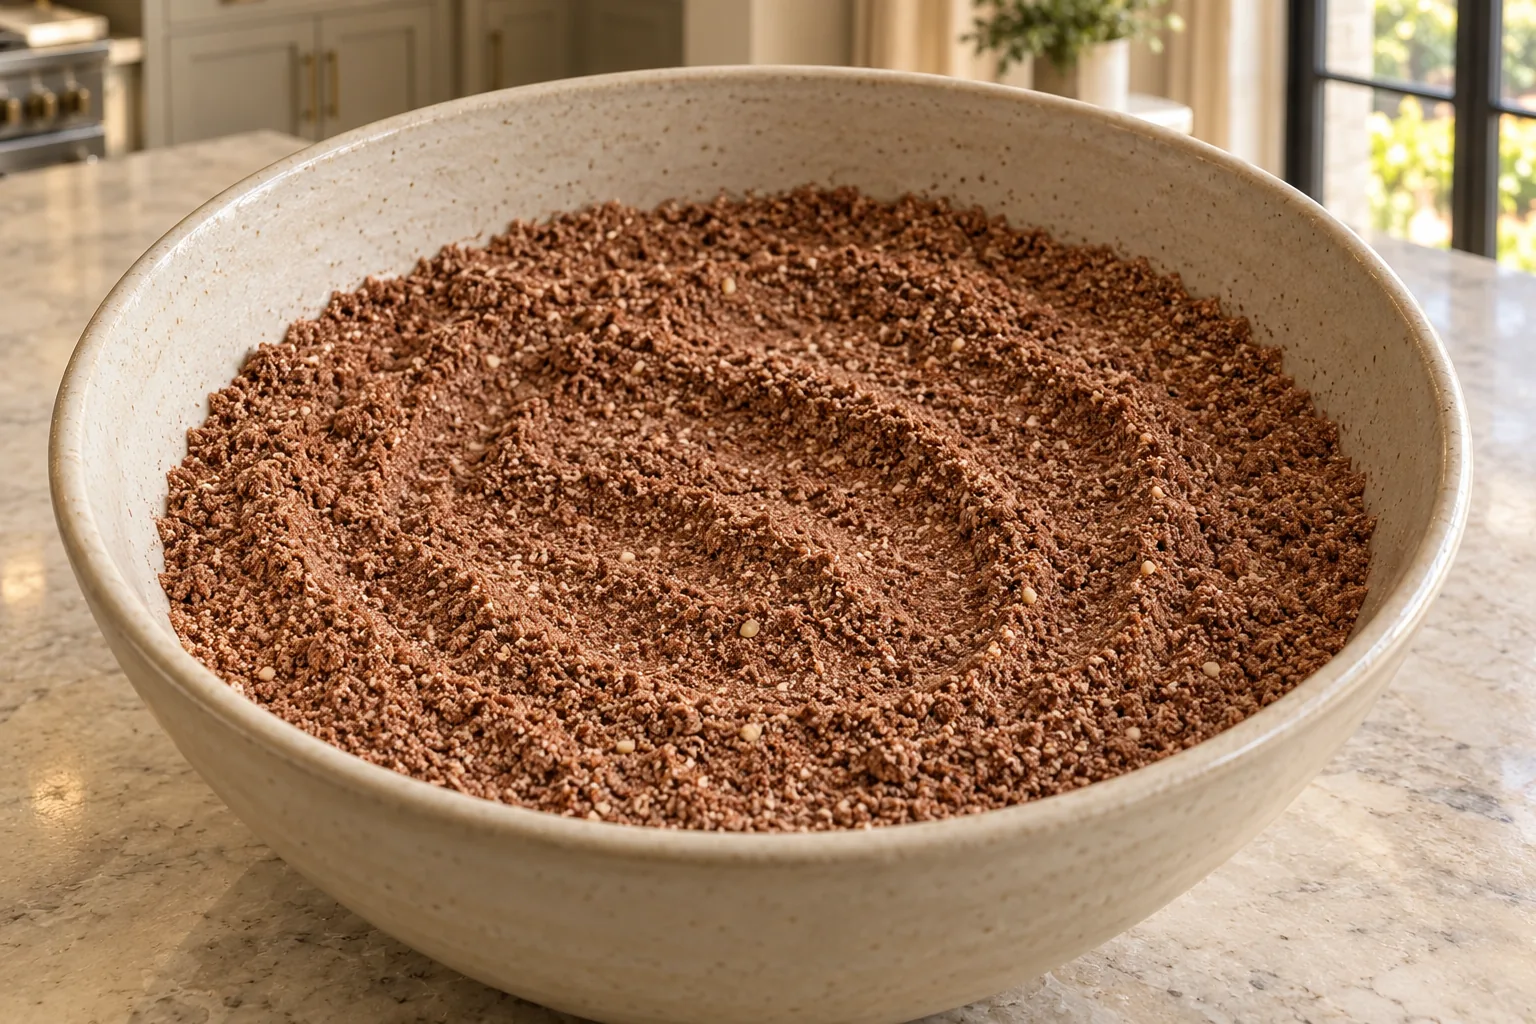
Combining the dry ingredients first prevents a pocket of unsweetened cocoa in one slice and an almost plain almond edge in another. It also lets you spot an almond-flour lump before the fat makes it harder to break apart. You do not need to beat air into anything; a few thorough turns are enough when the color is consistent.
Bring The Crumbs Together
In a second bowl, work the solid coconut oil and raw honey together. Stir that mixture into the dry ingredients with a fork or pastry blender. At first it will make uneven dark crumbs. Keep folding and cutting the fat through until you no longer see a separate pale lump of coconut oil or a streak of honey. Do not keep stirring in pursuit of a smooth batter; this is a press-in crust.
Add exactly two teaspoons of ice water. Fold the crumbs gently, lifting from the bottom of the bowl. They should look slightly moister and form a loose cluster when pressed, while much of the bowl still looks crumbly. If you drag a fork through it, the fork should leave a shallow track rather than a glossy smear. The second process photo shows this paused stage.
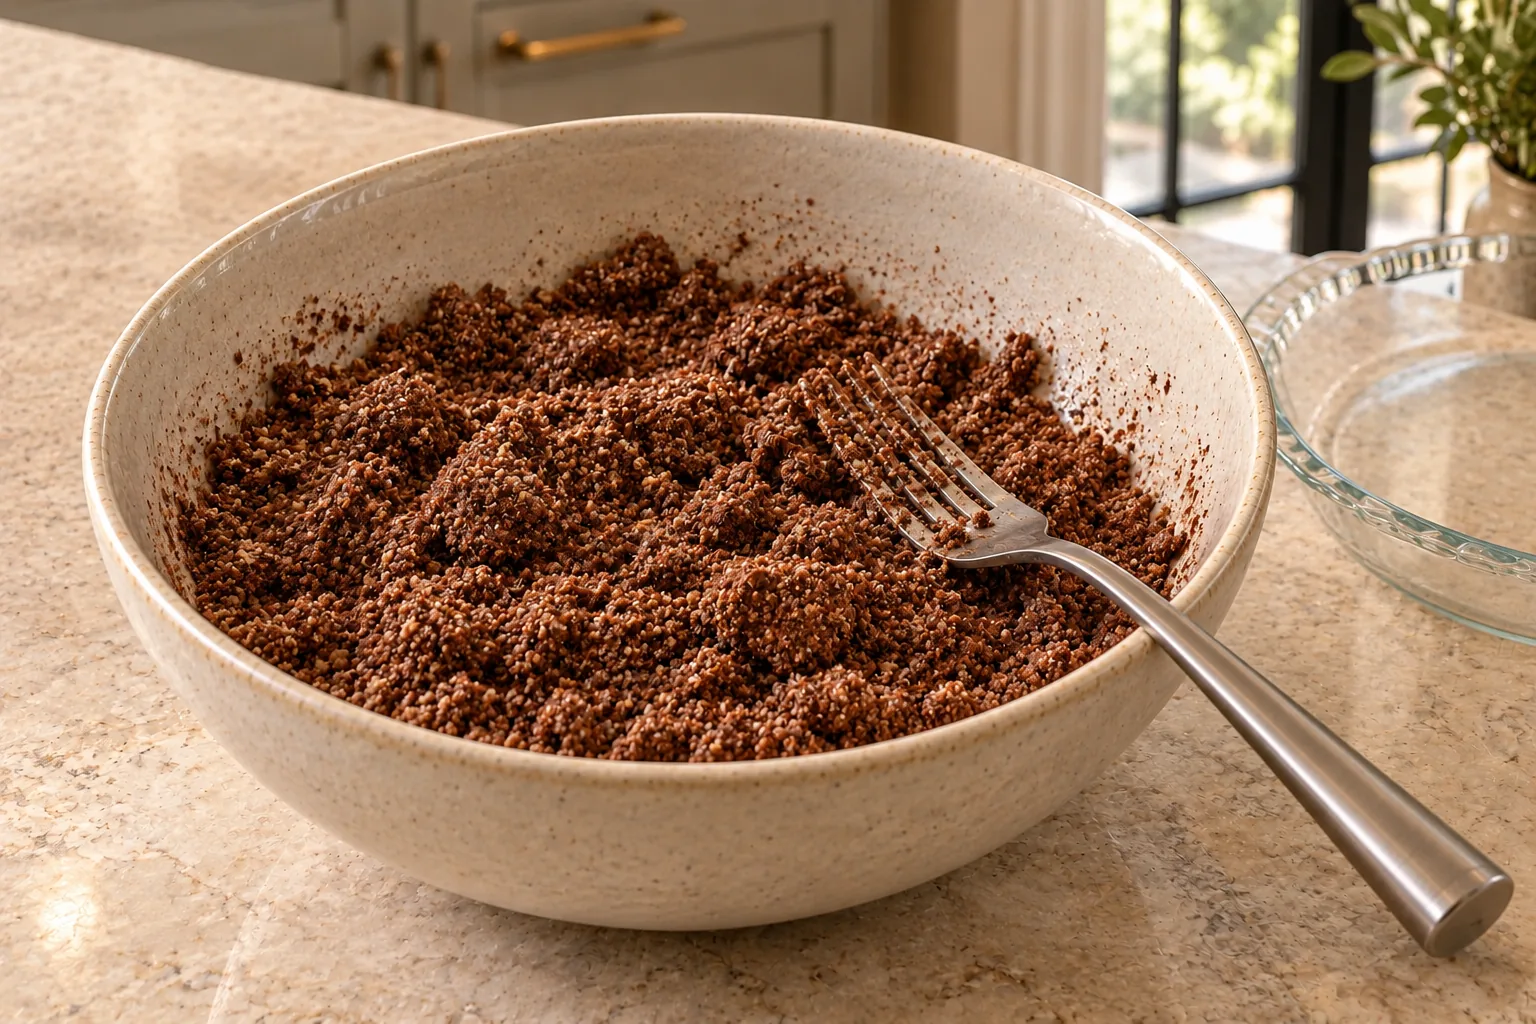
If the crumbs seem stubborn at first, squeeze a small portion before adding anything: fine almond flour can look loose in the bowl yet hold when pressed. A little pressure should bring the particles together. Keep the water at the measured two teaspoons. Extra water can turn a light, crumbly shell into a dense paste.
Press The Crust Into The Pie Dish
Transfer about half of the crumbs to the bottom of a 9½-inch pie plate. Spread them out and press gently but firmly from the center toward the outer edge. Look through a glass plate, or lift the edge of an opaque plate, to find thin spots. The bottom should be continuous, with no bare glass and no large mound in the middle.
Use the remaining crumbs for the sides. Drop small handfuls around the perimeter and press upward into a wall. Work around the plate instead of trying to form the entire side from one large handful. The top edge can be rustic. What matters is that the corner where the bottom meets the side is connected; a gap there can let a soft filling escape when a slice is cut.
If one part of the wall is taller than another, move a little crumb from the tall area to the thin one. Do not press so hard that all the texture disappears. A few tiny almond flecks and gentle finger-pressed irregularities should remain visible. This crust does not go in the oven, so the finished empty shell looks matte cocoa-brown rather than toasted or shiny.
Where It Fits On GAPS
Use this crust only at the later Full GAPS point when cocoa is appropriate for the person eating it. Almond flour and honey are also not Introduction Diet foods. Preparing the almonds properly is part of the ingredient choice, not an optional garnish. If your household is still working through earlier stages, keep the recipe for later rather than removing the cocoa and calling the remaining crumbs the same crust.
Removing cocoa or switching nuts changes the crust; there is no Intro version here. A different nut or fat can change how the crumbs press and hold, so follow the measured ingredients for this recipe. If a later Full GAPS meal is dairy-free, the crust itself contains no dairy. Check the separate filling you choose as well; a dairy-free crust cannot make a dairy-containing filling dairy-free.
The ingredient list is deliberately short. That makes it especially important to use plain cocoa and prepared almond flour, not a packaged baking mix. Read any purchased ingredient label for additions before it goes into the bowl. The crust’s GAPS placement comes from the ingredients and their preparation, not from the word “no-bake.”
Fill, Chill And Serve
This crust is meant to hold a chilled chocolate pie filling. Press it first, then add the filling according to its own directions. Chill the assembled pie until the center has set before slicing. You can also use the shell with another later Full GAPS chilled filling whose ingredients and consistency suit a press-in crust.
For clean slices, make sure the filling has set before cutting through the crust. Use a sharp knife and support the first slice with a thin spatula as you lift it from the dish. The first piece is often the most awkward because the rest of the pie still holds the side wall in place. A small crumb at the tip is normal for a pressed almond crust.
The chocolate-cashew pie that inspired this shell is chilled several hours, preferably overnight, and the filled pie may be frozen. If the empty shell must wait while you prepare the filling, keep it covered and cool rather than leaving it beside a warm stove. Once filled, follow the filling’s storage directions for the complete pie.
Frequently Asked Questions
Does The Crust Need To Go In The Oven?
No. This is pressed into the pie plate and used without a bake step. Baking it would be a different method and would change the color and texture shown here.
Why Does The Mixture Still Look Crumbly After Water?
Only two teaspoons of ice water are added. The oil and honey help the mixture hold when pressed, but it is not meant to become a smooth dough. Squeeze a small portion; it should form a loose clump. Then use pressure against the plate to make the continuous bottom and wall.
Can I Use This During The Introduction Diet?
No. This is a later Full GAPS cocoa dessert component with almond flour and honey. It is not an Intro recipe. Keep the current stage’s food and preparation rules rather than changing the label on this crust.
Can I Substitute Commercial Almond Flour?
The recipe calls for flour from properly prepared almonds. Our prepared almond flour recipe gives an internal starting point. Commercial flour may differ in freshness and preparation, so it is not presented here as an automatic equivalent.
Is The Crust Supposed To Taste Very Sweet?
Two tablespoons of raw honey sweeten the entire 9½-inch shell. Cocoa keeps the flavor distinctly chocolate rather than candy-sweet. The sweetness of a finished slice also depends on the separate filling.
Equipment For A Press-In Crust
Use a 9½-inch pie plate, two mixing bowls, measuring cups and spoons, a whisk for the dry ingredients, and a fork or pastry blender for the fat and honey. A clear glass plate lets you check the base, but the method does not require a specialty machine or branded appliance. A sturdy spoon or the flat base of a small measuring cup can help level the bottom after you have distributed the crumbs.
A pastry blender is convenient but not essential. Work a fork through the solid oil and honey until the fat is distributed, then fold in the ice water. Stop when a squeezed bit holds together. The crust takes its shape in the pie plate, so there is no need to buy a dough mixer for this small job.
More Later Full GAPS Chocolate Ideas
If your household is already at the later Full GAPS point for cocoa, the no-bake sesame chocolate nut bites are another small make-ahead dessert. For a prepared-almond starting point before this crust, go to the homemade fermented almond flour guide. The planned WFLI No-Bake Snacks Cookbook will gather more options for busy weeks; watch the shop for its release.
No-Bake Chocolate Almond Pie Crust Recipe
No-Bake Chocolate Almond Pie Crust for Later Full GAPS
Ingredients
Equipment
Method
- In a broad bowl, whisk 1 1/2 cups flour from properly prepared almonds with 3 tablespoons pure cocoa powder and 1/4 teaspoon mineral salt. The dry mixture should be even, matte and powdery with no separate cocoa pocket.
- In a second bowl, work 1/4 cup solid coconut oil with 2 tablespoons raw honey. Use a fork or pastry blender to cut this mixture into the dry cocoa-almond flour until small uneven crumbs form; do not make a smooth paste.
- Fold in exactly 2 teaspoons ice water. The crumbs should remain distinct but form a loose clump when pressed. Do not add extra water to turn them into batter.
- Press about half the crumbs across the bottom of a 9 1/2-inch pie plate in a thin continuous layer. Press the rest up the side in small handfuls and join the bottom-to-side corner without bare gaps. Do not bake. Add a separate chilled filling according to its own recipe.
Notes
Tried this recipe?
Let us know how it was!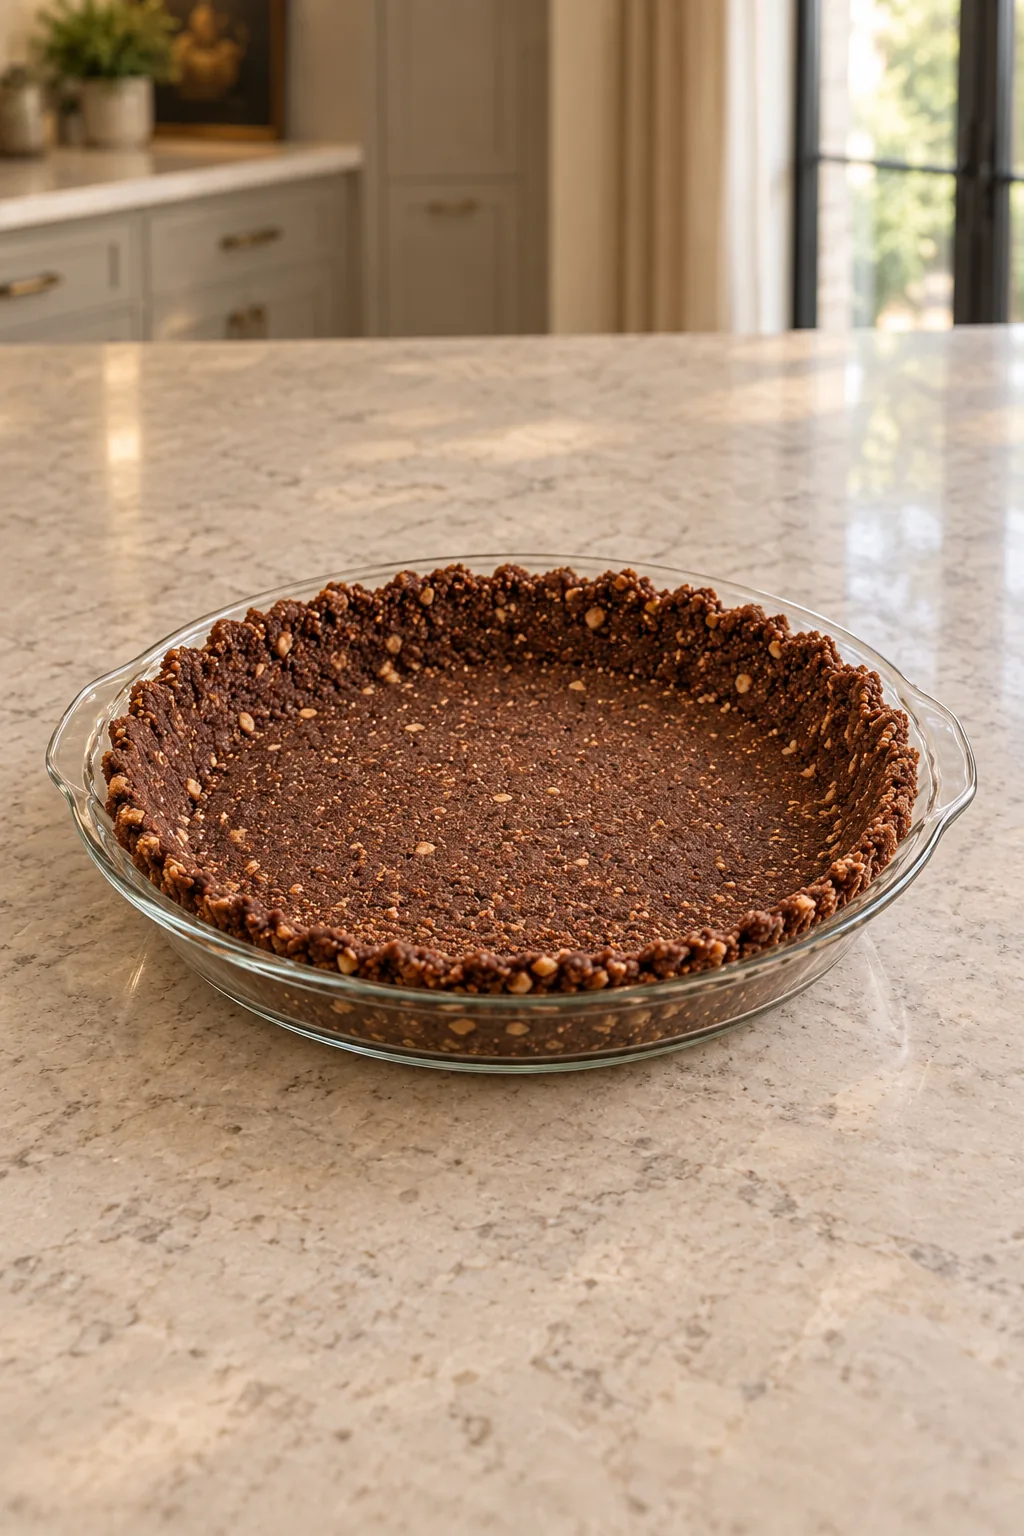

Leave a comment