

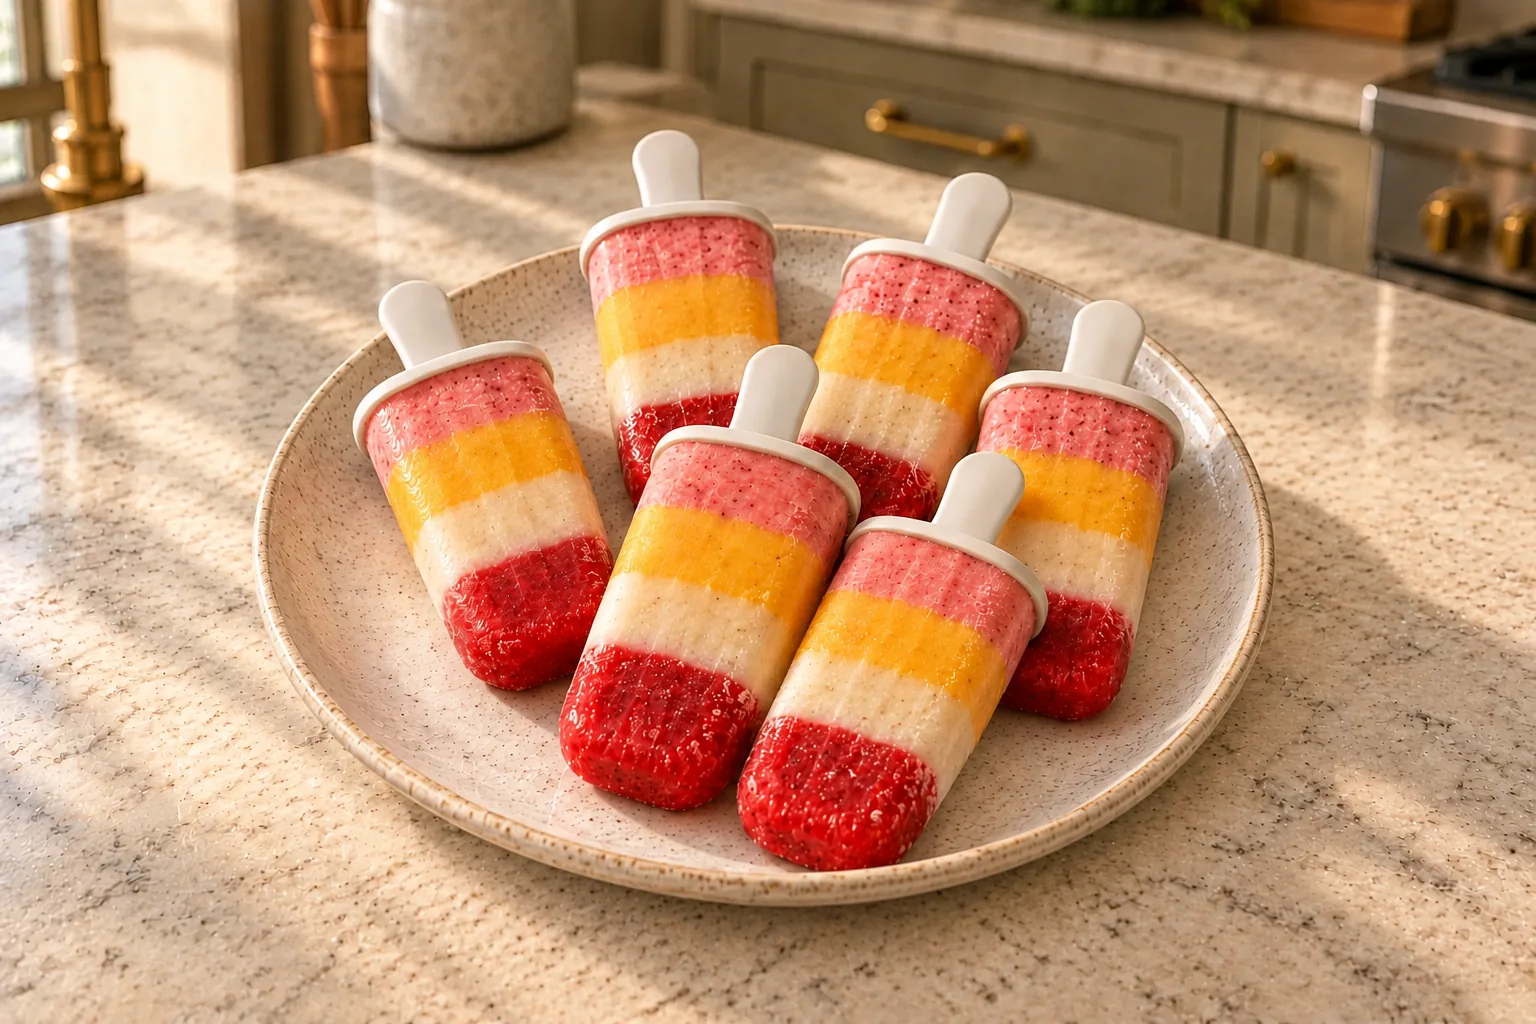
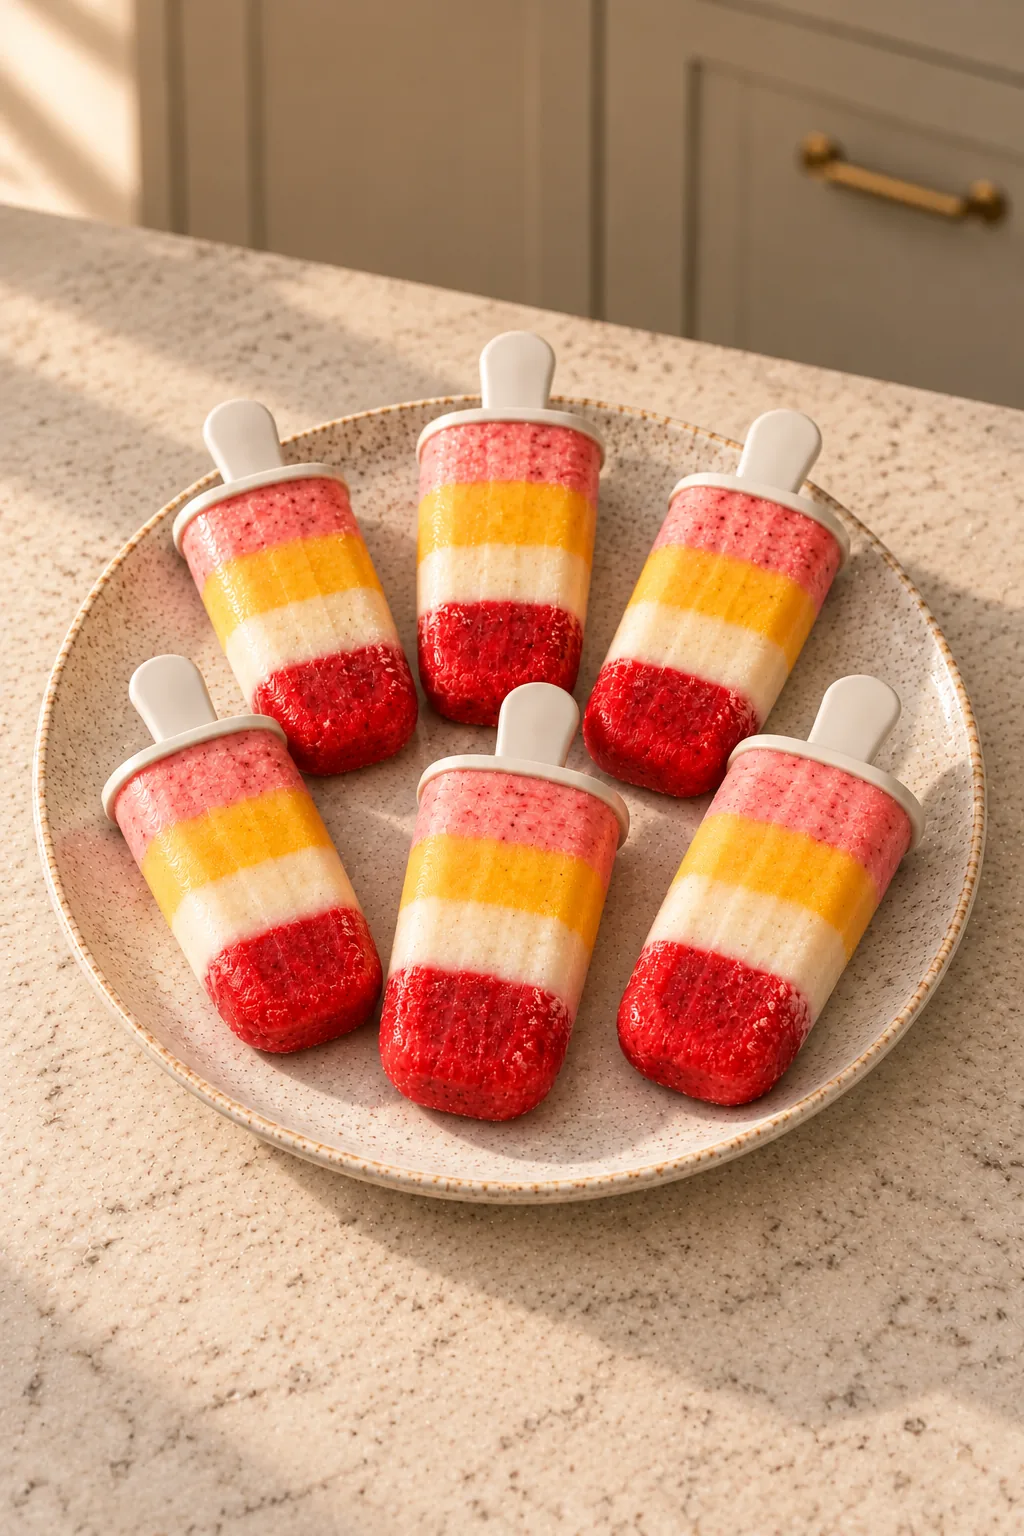
Layered Banana Mango Strawberry Fruit Popsicles turn four simple fruit preparations into six small striped freezer treats. The layers are plain strawberry, mashed ripe banana, smooth mango, and strawberry-banana. Raw honey is optional.
The finished pops taste like the fruits you put into them: bright strawberry at the tip, mellow banana in the next band, creamy mango, then a softer pink strawberry-banana layer near the handle. There is no refined sugar, syrup, coloring, flavoring, dairy, or commercial juice.
With six kids, a six-pop batch has an obvious practical advantage. Everyone can have one, and each 2.5-ounce pop is small enough to stay a snack rather than replacing a meal. The layering takes a little more attention than blending all the fruit together, but the work is easy to divide into four bowls and repeat across the molds.
The source describes the striped result as a homemade answer to colorful “bullet” popsicles. That memory belongs in the story, while the recipe title says exactly what is in these: banana, mango, strawberry, and optional raw honey.
Where These Fruit Popsicles Fit On GAPS
These fit the GAPS Introduction Diet at Stage 6 only after raw banana, mango, strawberries, and optional raw honey have each been introduced separately and are going well. They also fit Full GAPS after the same ingredients are established.
Stage 6 is the point where raw peeled fruit is introduced. The timing matters because a frozen raw-fruit pop is not the same preparation as cooked fruit used earlier. Keep the pops as a snack between meals instead of using them to replace meat stock, soups, eggs, meats, fermented foods, or the rest of the day’s core GAPS foods.
If honey has not been introduced, leave it out. The fruit supplies the structure and most of the sweetness, so the recipe still works without it. When honey is used, keep it raw and blend it into the cold strawberry purée.
Use Brown-Spotted Bananas
Choose two ultra-ripe bananas with brown spots across the peels. They should smell sweet and mash easily under a potato masher. Firm yellow bananas are too starchy for this route and will leave the banana layer less sweet and more resistant to a smooth bite.
Peel and mash the bananas until no firm coins remain. The texture can keep small soft mash marks; it does not need to become a blender-smooth purée. Divide the mash into two equal portions. One stays plain, and one will be mixed with strawberry.
Prepare The Mango In The Ninja BN801
Peel one mango and cut the flesh away from the pit. The pit can be slippery and its thin edge can feel sharp, so set it on the cutting board instead of holding it in the air while scraping. Use a spoon to collect the remaining flesh.
Put the mango into the exact Ninja Professional Plus Kitchen System BN801 single-serve cup. Secure the compatible blade assembly, lock the cup onto the base, and pulse until the purée is smooth and creamy with no pale or fibrous pieces. Stop the machine before removing the cup or scraping the sides.
Blend The Strawberries Separately
Wash twelve strawberries, remove every green cap, and blend them separately in the cleaned BN801 single-serve cup until smooth. Add one tablespoon raw honey only if desired and already introduced. The strawberry purée should be thick enough to hold a layer rather than run like juice.
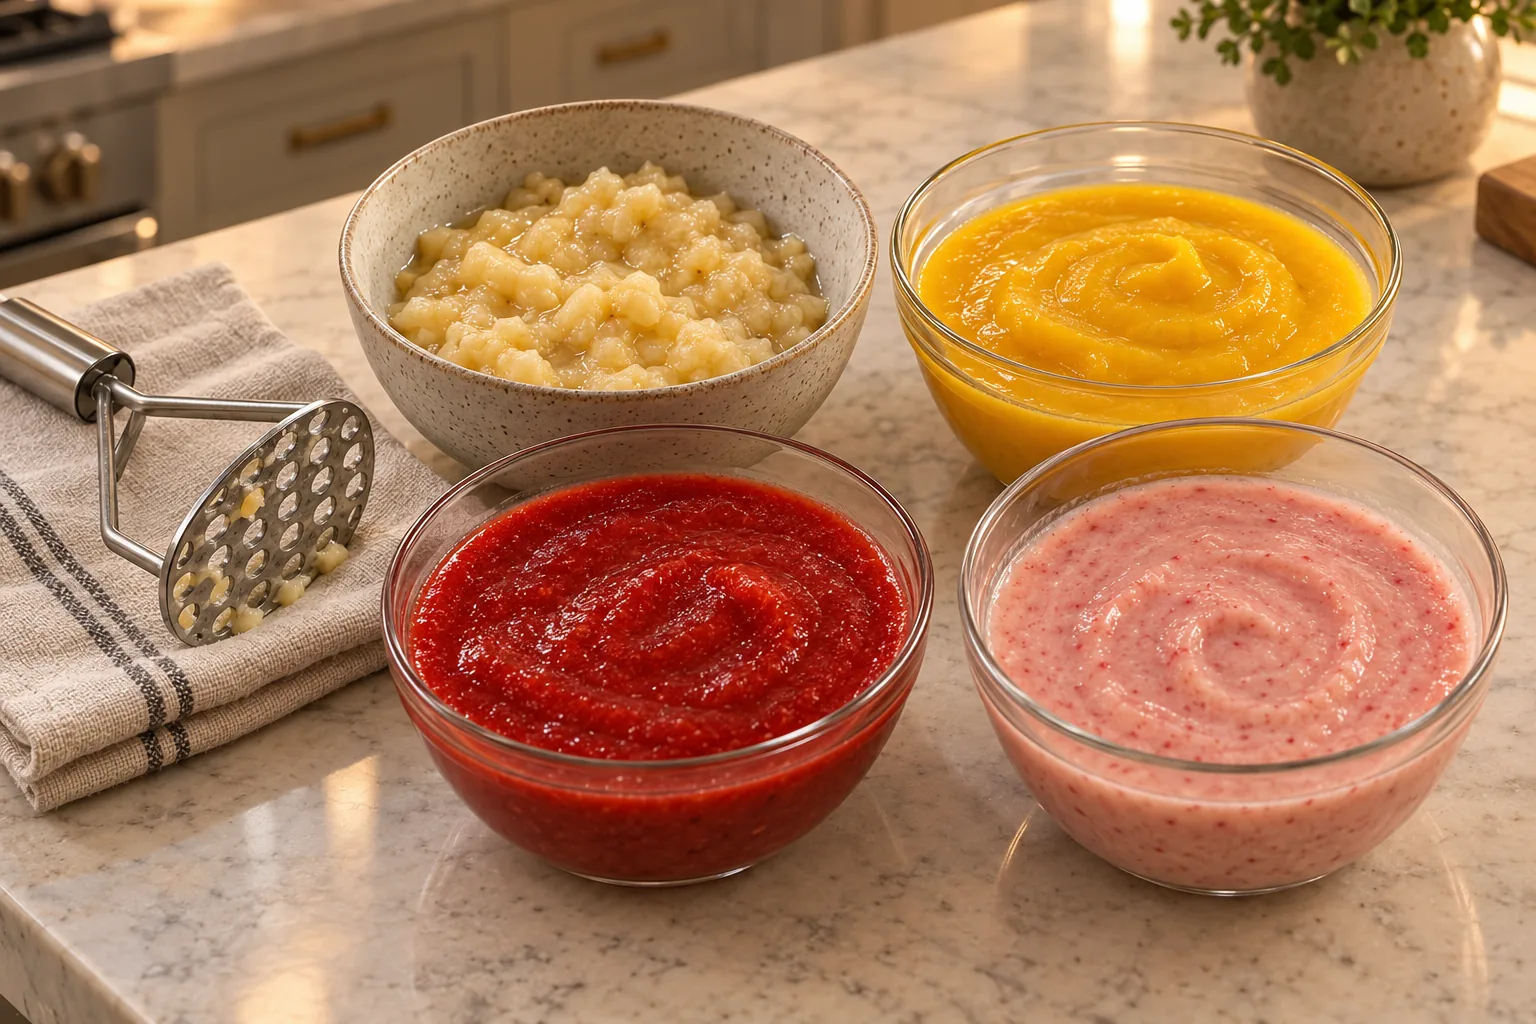
Divide the strawberry purée in half. Mix one half into one portion of mashed banana until the color is evenly pink. You now have four fillings: plain strawberry, plain banana, mango, and strawberry-banana.
Keep the four fillings separate until the molds are ready. The strawberry and mango should pour slowly from a spoon, while the two banana mixtures will be thicker and need to be nudged into place. That difference is expected. Do not thin any bowl with water or juice, because extra liquid changes the source’s two-cup fruit balance and makes the stripes more likely to bleed together.
Seat All Six Molds Before Layering
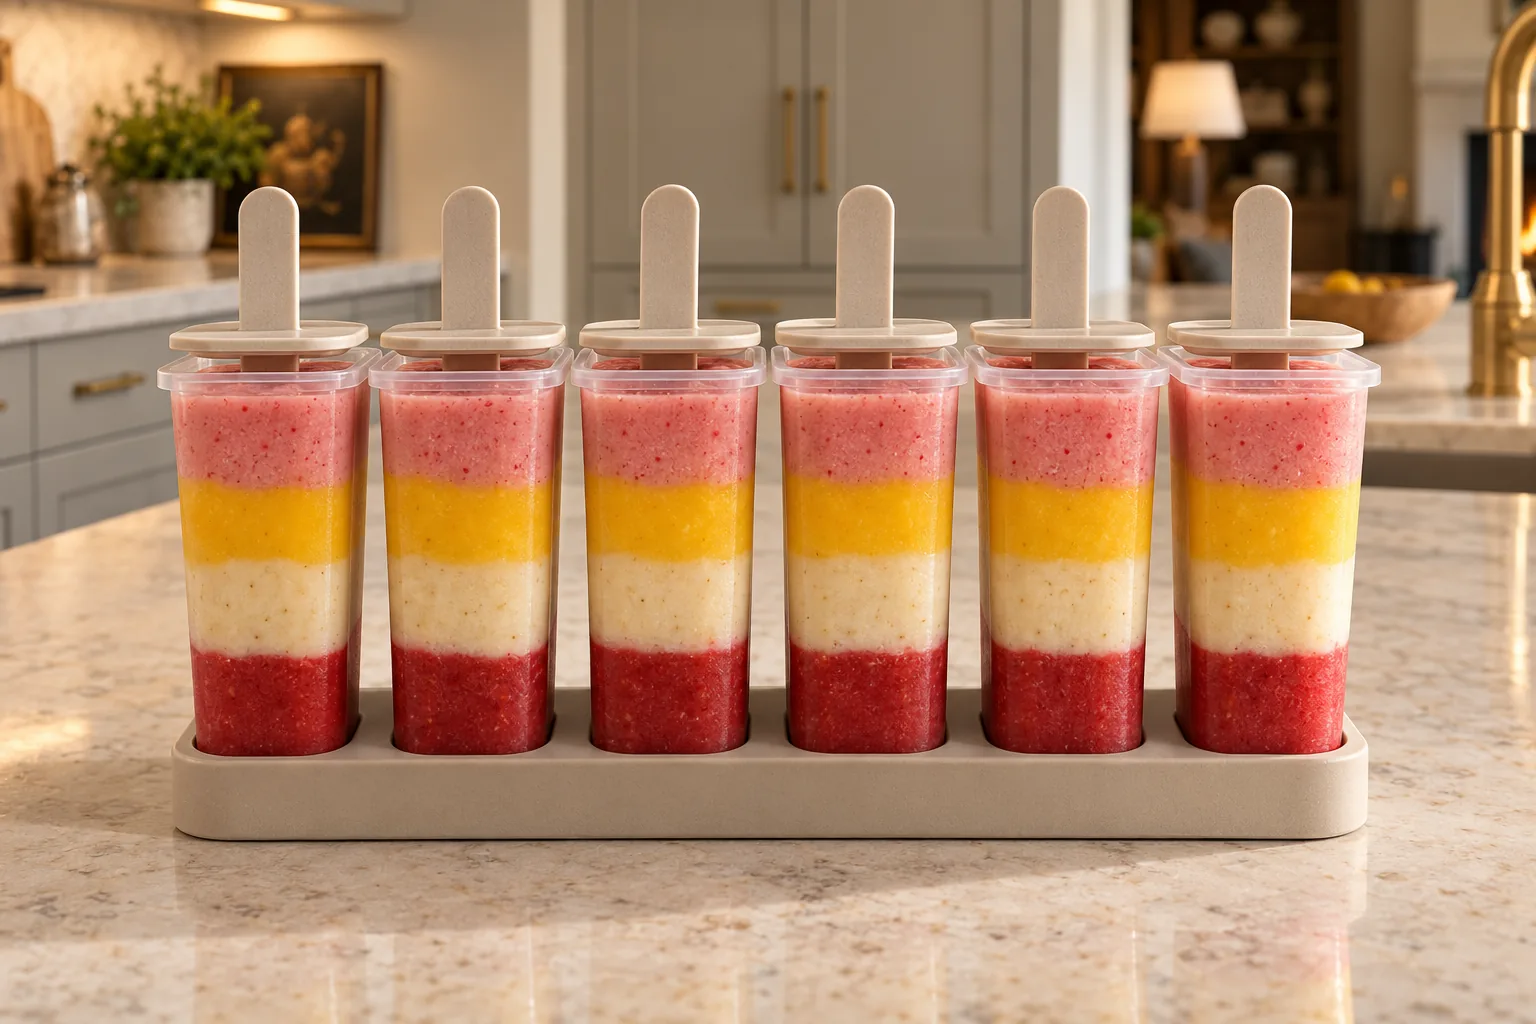
Set six 2.5-ounce molds firmly into their holder before filling. The complete batch needs about two cups of fruit mixture. Keeping the molds upright prevents the first layer from leaning and gives you both hands for spooning and releasing air pockets.
Add about two tablespoons plain strawberry purée to each mold. That makes a layer about one inch deep. Work across all six molds before beginning the next color so the finished stripes stay reasonably even.
Release Air Pockets After Every Layer
The fruit mixtures are thick and can trap empty pockets against the sides of the molds. After each layer, slide the handle of a long narrow stainless-steel spoon down along the inside wall and move it gently through the fruit. Stop when the visible gaps close.
Do not stir one color into the next. The goal is to settle the fruit enough that it freezes into one solid pop while leaving the four bands visible. Wipe the spoon handle between colors if fruit from one layer clings to it.
Keep The Layer Order Consistent
After the plain strawberry layer, add plain banana, then mango, and finish with the strawberry-banana mixture. Spoon each filling into all six molds before moving on. That order produces a red tip, creamy banana band, golden mango band, and pink top after the pops are unmolded.
Check the sides for air pockets as you go. A small natural ripple between colors is fine. A wide empty channel will freeze into a weak spot where the pop can break during release.
Use the same spoonful size from mold to mold rather than trying to make every stripe perfectly level. Real mashed fruit settles unevenly. The practical target is six filled molds with the same order, enough room for each handle, and no large gaps along the walls.
Leave Space Below The Rim
Stop filling just below the top of each mold. The handle displaces some fruit when it is set in place. Filling to the brim first pushes the pink layer over the edge and leaves sticky frozen overflow around the holder.
Rest the handles lightly on top. Do not force them down until they click into a locked position. The source notes that a fully pressed handle makes the frozen pop much harder to remove from the mold.
Freeze Overnight For The Cleanest Release
Move the level holder to the freezer and freeze overnight. The centers need to be completely firm before you pull on the handles. A pop that looks frozen at the outer wall can still be soft near the handle when it has had only a short freeze.
To release one pop, run warm water over the outside of that mold for 30 to 45 seconds. Pull gently and steadily. If only the handle comes out, return a little water to the handle opening, replace the handle, and freeze for a few more hours rather than digging the fruit out.
If the red strawberry tip stays behind in the mold, use a small amount of water to join it back to the exposed pop, return the pop to the mold, and freeze again. That preserves the serving instead of turning it into a broken bowl of frozen fruit.
Serve And Store The Popsicles
Serve the pops straight from the freezer after unmolding. For Stage 6, keep the serving consistent with the eater’s established raw-fruit tolerance. On Full GAPS, the same small mold size keeps the treat easy to place between meals.
Keep unused pops frozen in their molds or move fully frozen pops to a covered freezer-safe glass container with parchment between them. Return them to the freezer promptly so the layers do not soften and refreeze into an icy surface.
For another fruit-forward frozen option, try Piña Colada Sorbet for Full GAPS. For a creamy pop with a different formula, use Strawberry Coconut Cheesecake Popsicles for Full GAPS.
Recommended Equipment
- Ninja Professional Plus Kitchen System BN801 with single-serve cup and compatible blade assembly
- Potato masher
- Stable wooden cutting board and sharp paring knife
- Four small glass or neutral ceramic prep bowls
- Tablespoon measure
- Six 2.5-ounce reusable pop molds with holder and separate handles
- Long narrow stainless-steel spoon
- Small silicone spatula
Frequently Asked Questions
Do I Have To Layer The Fruit?
No. The source says the fruit can be blended together for one mixed flavor. This card keeps the complete four-layer version because that is the distinct formula and presentation being made here.
Is The Raw Honey Necessary?
No. It is optional. Leave it out when the fruit is already sweet or when raw honey has not been introduced. Ultra-ripe banana, mango, and strawberry still freeze into the same layered structure.
Why Did A Layer Break Off?
The pop may not have frozen completely, an air pocket may have weakened the layer, or the mold may need more warm water. Freeze overnight, release trapped air during assembly, and warm the outside for the full 30 to 45 seconds.
Can I Use Firm Yellow Bananas?
Use ultra-ripe bananas with brown spots. They are the source-specified GAPS route and mash into a sweeter, softer layer. Firm yellow bananas are not the equivalent ingredient.
Can I Double The Recipe?
Yes. Use the WPRM 2× control for four bananas, twenty-four strawberries, two mangoes, and up to two tablespoons optional raw honey. Use twelve 2.5-ounce molds or freeze in two batches.
When Can I Serve These During Intro?
Stage 6, after each raw fruit and optional raw honey has been introduced separately and tolerated. This is not an earlier-stage cooked-fruit preparation.
Layered Banana Mango Strawberry Popsicle Recipe
Layered Banana Mango Strawberry Fruit Popsicles
Ingredients
Equipment
Method
- Peel and mash the ultra-ripe bananas with a potato masher until no firm coins remain. Divide the mash into two equal portions.
- Peel the mango, cut the flesh away from the slippery pit, and blend the flesh in the exact Ninja BN801 single-serve cup until smooth and creamy. Transfer to a prep bowl.
- Wash and hull the strawberries. Blend them separately in the cleaned BN801 single-serve cup until smooth, adding the optional raw honey if using. Divide the strawberry puree in half and mix one half evenly into one portion of mashed banana. You now have four fillings.
- Seat six 2.5-ounce molds in their holder. Add about 2 tablespoons, or 1 inch, plain strawberry puree to each mold. Release air pockets against the mold wall with the clean handle of a long narrow stainless-steel spoon.
- Add the plain banana layer, then mango, then strawberry-banana, releasing air pockets after each color without stirring the layers together. Stop just below each rim.
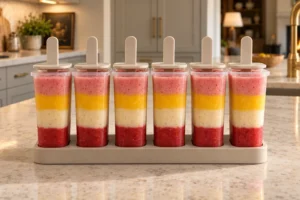
- Rest the handles lightly on top without pressing them down until they click. Freeze the level holder overnight, until every pop is firm through the center.
- Run warm water over the outside of one mold for 30 to 45 seconds, then pull gently and steadily. If the handle releases without the pop, add a little water to the opening, replace the handle, and freeze for a few more hours.
Notes
Yield: The source yields about 2 cups, enough for six 2.5-ounce molds.
Layers: Layer plain strawberry, plain banana, mango, then strawberry-banana; keep the final fill just below the rim.
Freeze: Freeze overnight for the best release.
Tried this recipe?
Let us know how it was!Keep More Frozen Treats Ready
The upcoming Frozen Treats Cookbook brings yogurt pops, fruit pops, frozen bites, sorbets, and honey-sweetened ice creams into one GAPS-organized collection. Find current releases and upcoming additions in the WFLI shop.

Leave a comment